How to Clean Filthy Window Tracks and Sills
April 19, 2023
Share this
I tested three ways to clean filthy door and window tracks. See my favorite method here!
Our window sills and door tracks were GROSS and desperately needed to be cleaned. Our sliding back door track was by far the worst spot. YUCK.
I can't believe I forgot to take a photo of the full before, but don't you worry, you'll get to see plenty of the nastiness as we go.
Before tackling these fithy spots, I wanted to figure out the best way to clean the sills and tracks. Otherwise I knew it would take forever to get all of the grime out of the little crevices.
I did some research and found three hacks/tools for cleaning out your dirty window sills and door tracks. I tested all three for you and am sharing my results!
This post may contain affiliate links for your convenience.
I may earn a small commission when you make a purchase through links.
See my policies and disclosure page for more information.
Sill and track brush cleaning set
I found this window sill brush cleaning set that also has a few other handy cleaning doodads. They are all great for smaller spaces and hard to reach areas:
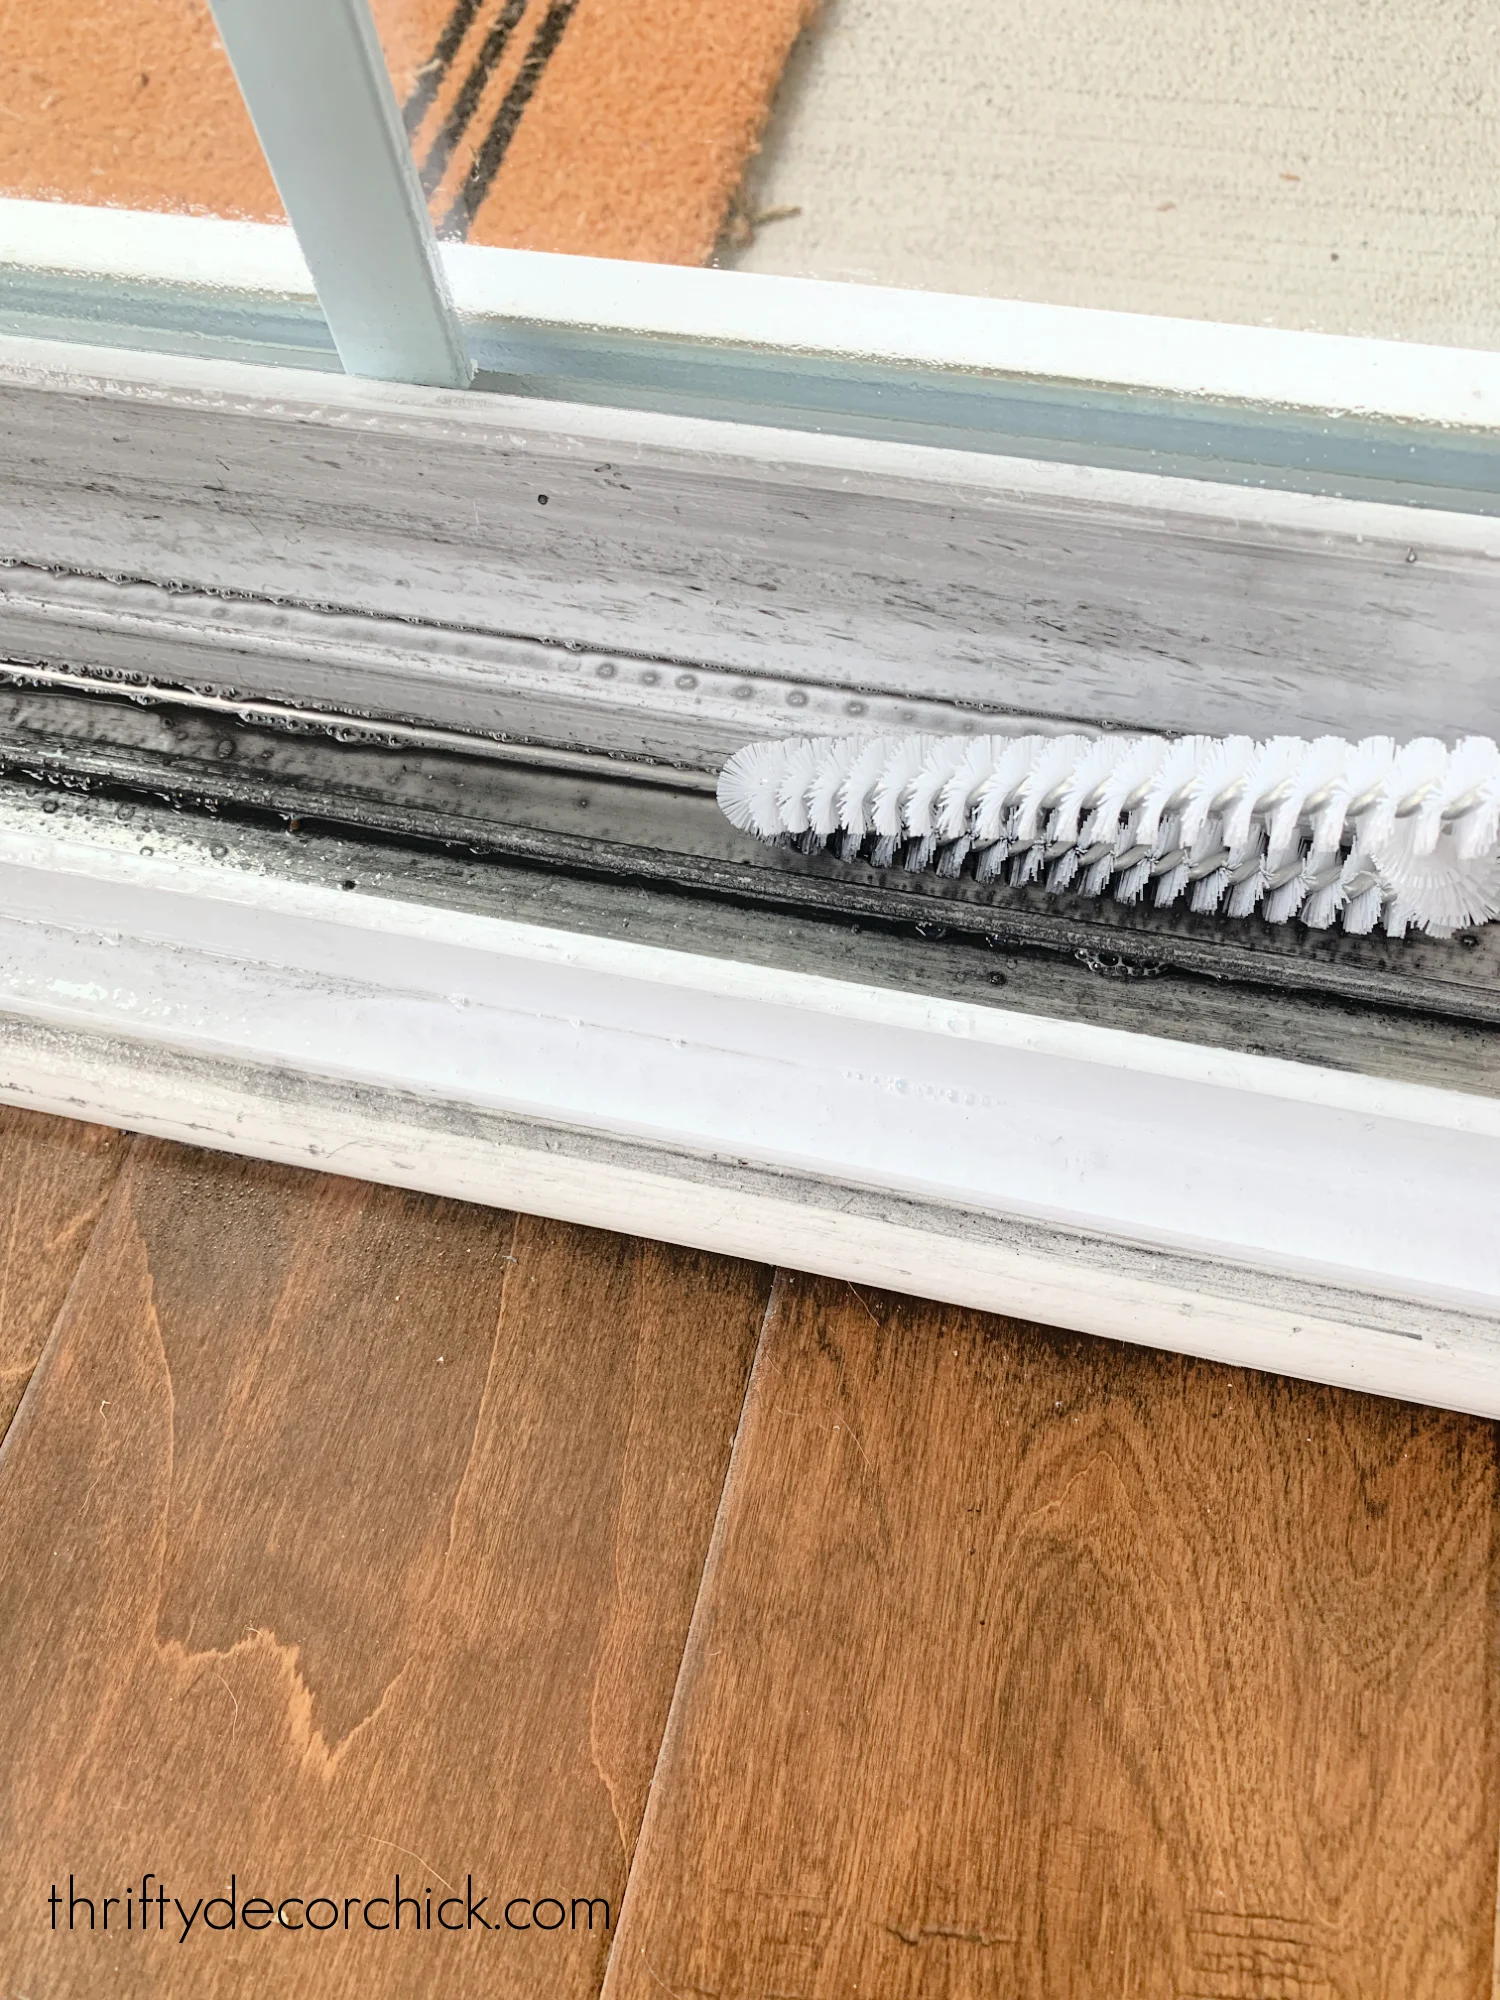
I first sprayed the whole track with a cleaning solution, then started in with this brush.
It did a great job of cleaning the dirt off the bottom of the track, but didn't get into the corners much at all.
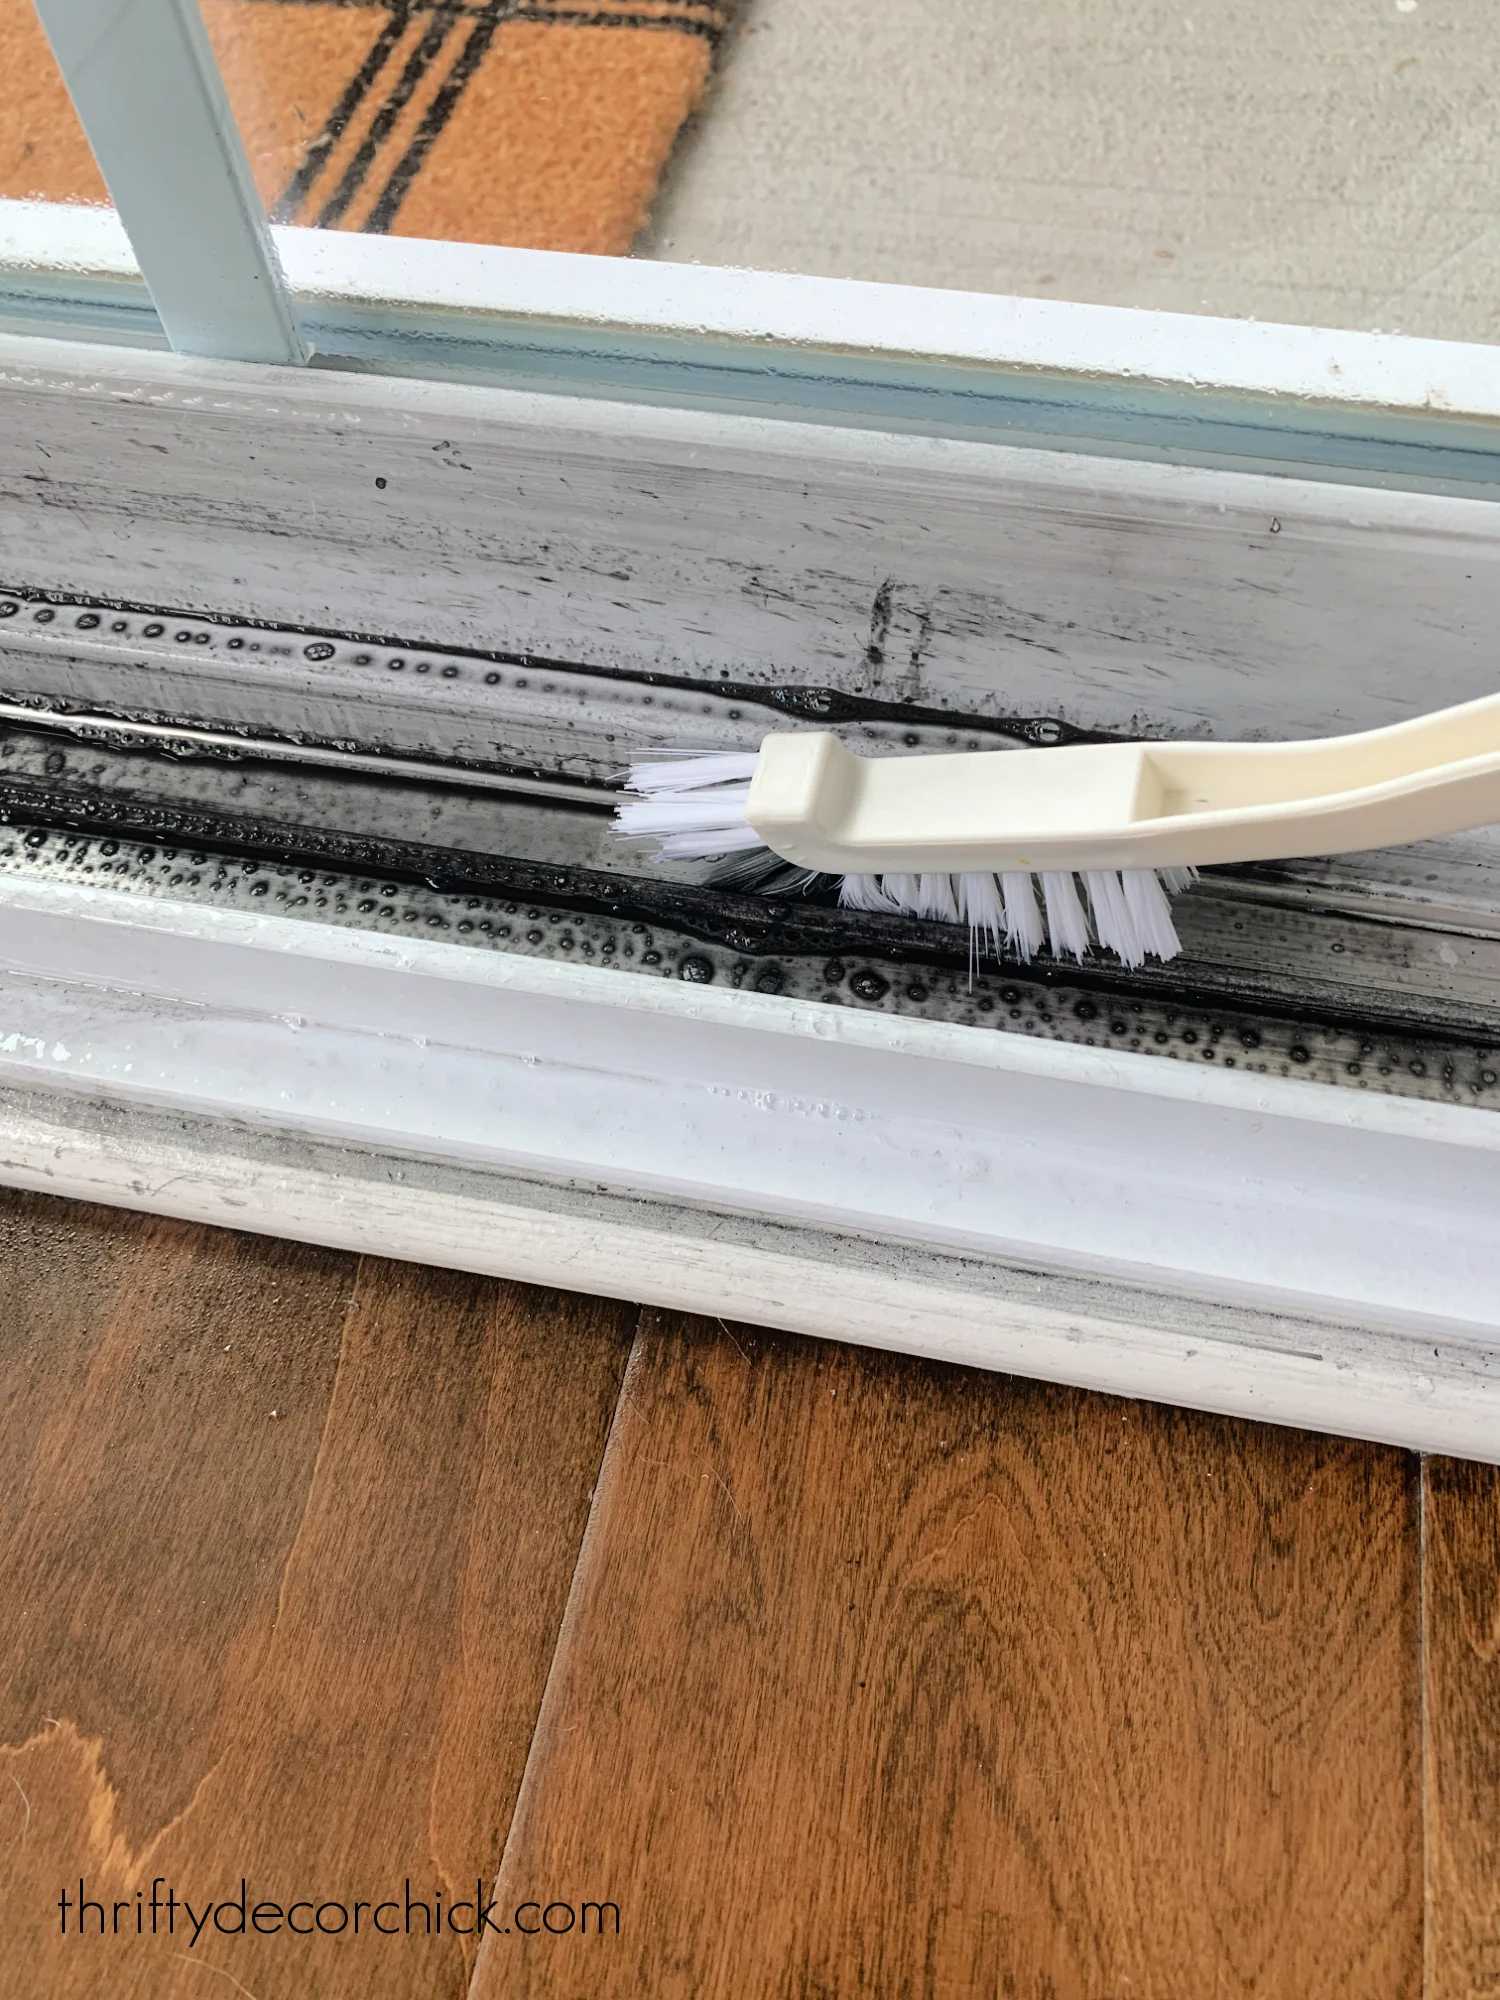
So I tried another one in the kit that worked MUCH better:
This one has plastic bristles as well, but they have more give. It was so much easier to get into the little crevices.
It did a good job! But even after scrubbing, rinsing and wiping it up, there was still plenty of dirt in there.
Next up, I tried an idea I had seen on Pinterest TONS of times. It looked so simple, I was excited to see how it worked!
The cut sponge window sill technique
For this one, you grab a scrub sponge and mark where you need to cut so the sponge will fit perfectly into the door track or sill:
My first inclination that this wasn't going to work well was when I noticed in all of the photos online the yellow, softer side of the sponge was being cut/used.
I knew that wouldn't be enough to get the grime and goo, so I did it with the green scrub side down.
Thing is, it's not easy to cut a straight, clean line into that green part.
I tried a sharp razor blade and it was difficult. I really had to dig it in to get it cut and quickly realized this was not a safe option. The sponge is too small to get good, multiple cuts with a razor blade (safely).
Then I tried scissors, which worked much better. But it wasn't a clean line and was still difficult to get it cut just right.
Finally, I decided to just try the softer yellow side like all of the instructions show. I used a sharp knife and started to slice into it when the most hideous squeak noise...five million times worse than fingernails on a chalkboard...erupted from the sponge.
NOPE.
Couldn't do it.
I ended up trying it with my horrible scissor cuts and it was just a big, fat no:
I didn't get the notches in the sponge deep enough, but even so I could tell immediately it wasn't going to work.
If you keep up with cleaning your door tracks regularly, using a sponge would probably be a great option! The brushes I showed you first worked WAY better though.
My final experiment was by far the winner! Of course it costs the most, but I cannot WAIT to try this out on all kinds of stuff around the house. (And the price really isn't bad considering how much we'll use it.)
Handheld steam cleaner (for the win!)
Holy cow, this thing is amazing!! Where has it been all my life?
I found this handheld steam cleaner after I found my new YouTube obsession -- car detailing videos. 😂
I can't stop watching them. I discovered The Detail Geek and his videos are mesmerizing to watch. They're especially relaxing before bed.
He uses a steam cleaner in the cars he details and it's amazing how well they clean. I had to get one...especially since I thought it may work well on our door track!
It comes with a bunch of little attachments. From the reviews that I read, the grout cleaner attachment is amazing. The videos are impressive!:
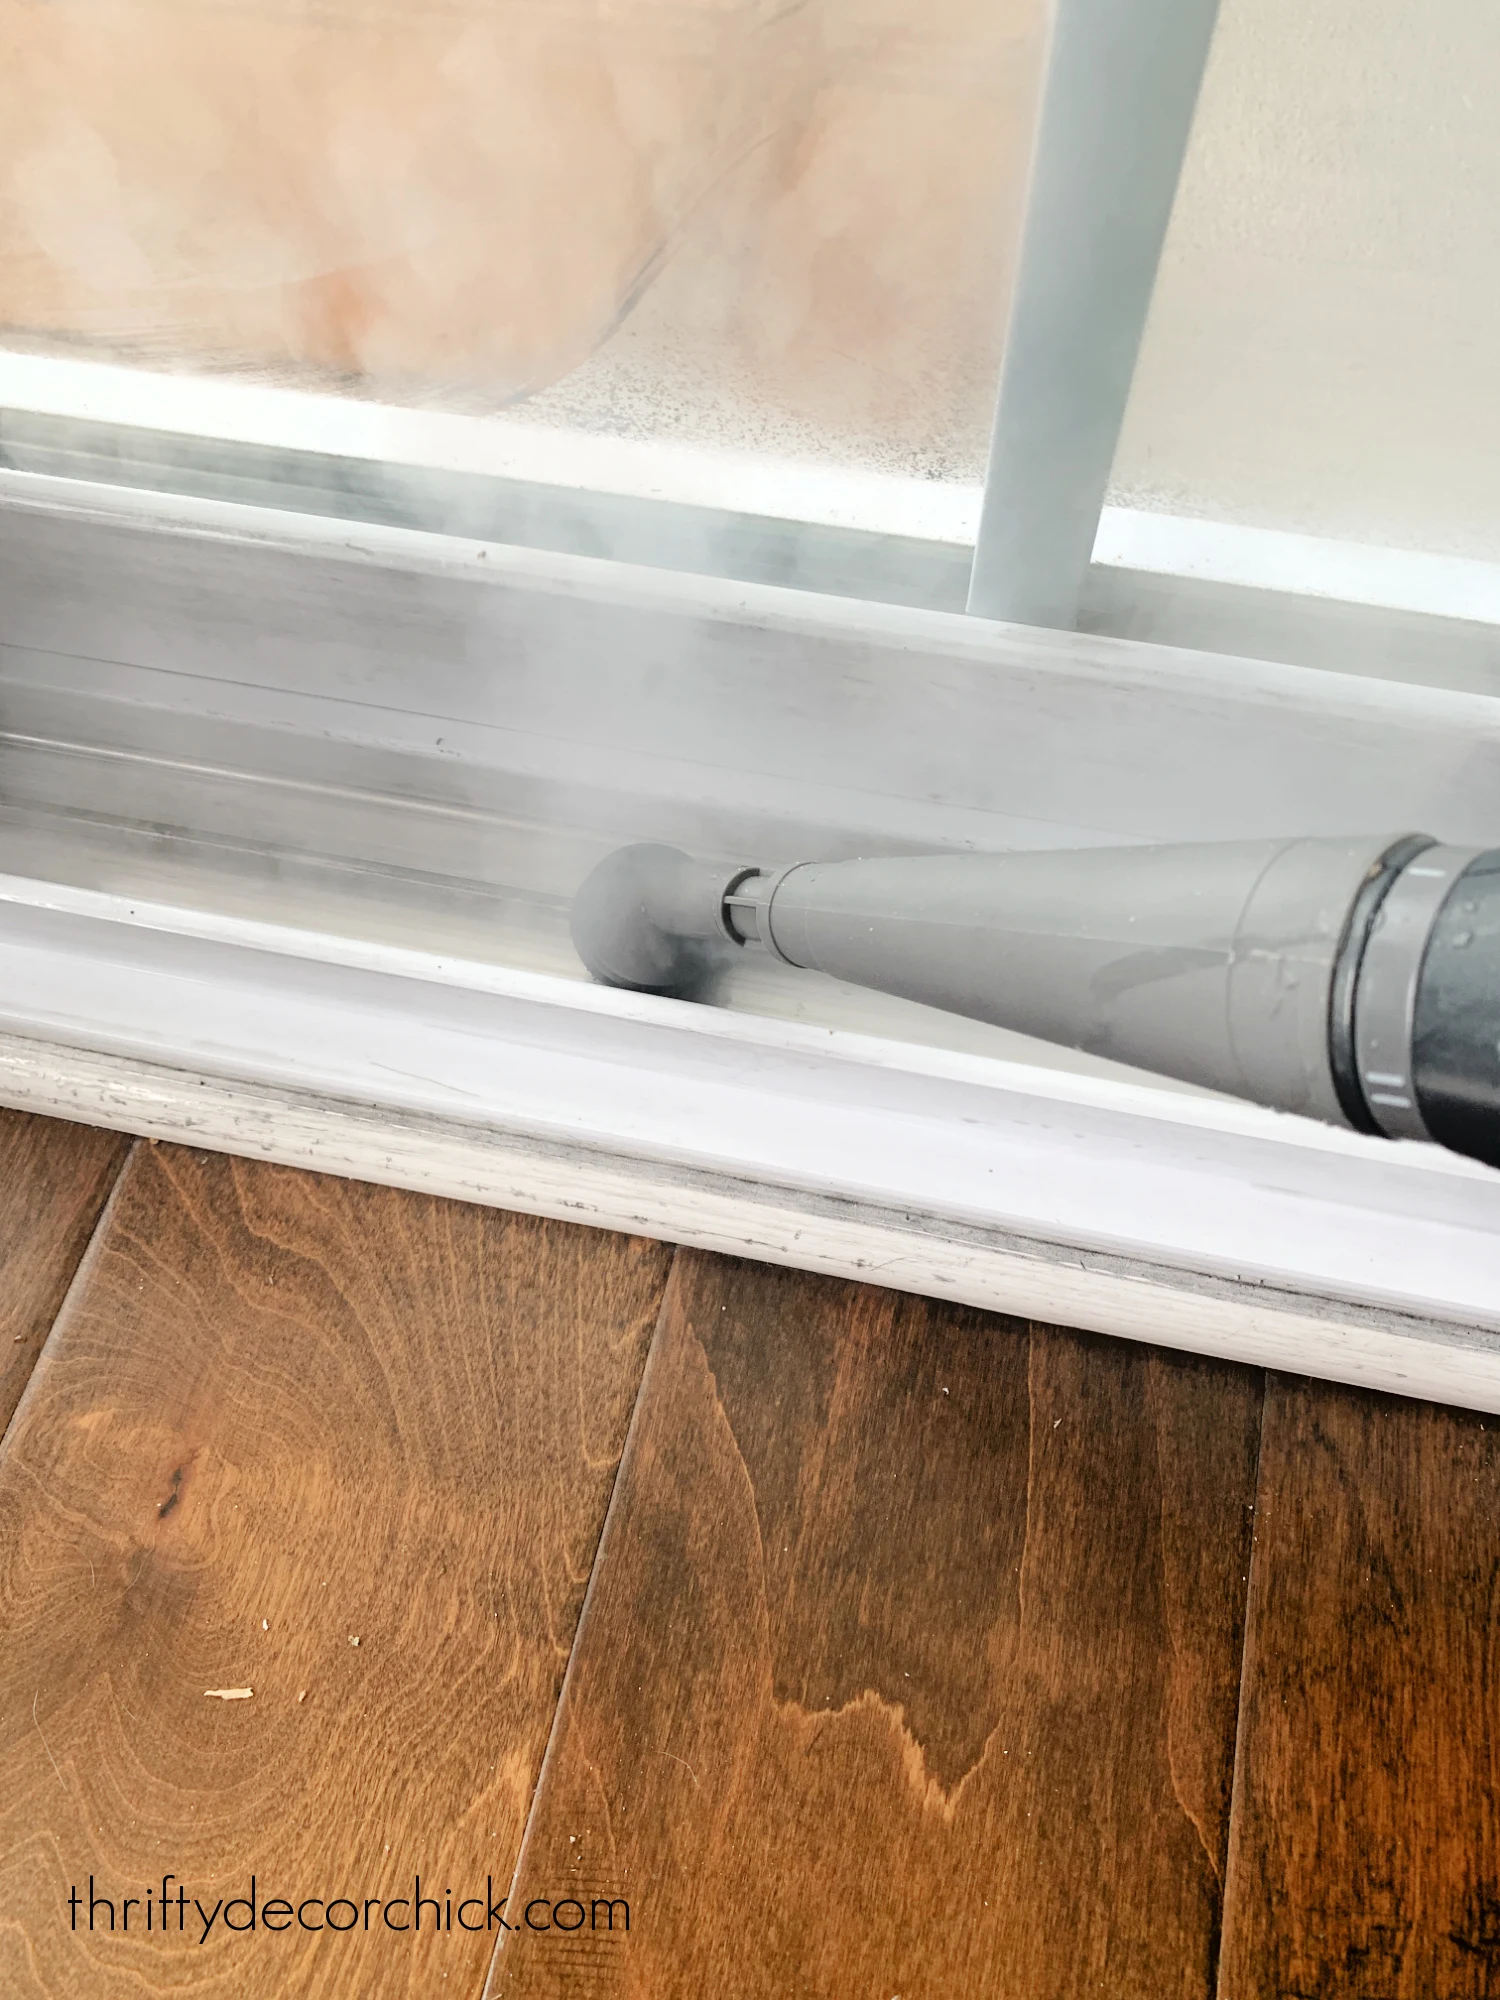
I used the basic nozzle attachment and was amazed at how quickly the dirt and grime melted off of the track.
Immediately I knew this one was the winner:
It was perfect for getting into the little crevices and corners. There's an angled attachment that makes it even easier to get into those tight spots.
There are small, round brush attachments that are awesome because you can really scrub the surface in combination with the steam:
By the way, I tried to stay away from the actual window -- I didn't run the steam along the plastic right up against the window just in case it would affect a seal in any way. I have no idea if it would, but figured it was best to not chance it.
I went back and forth between the two attachments to clean and then direct the dirty water towards the drain holes:
When it was clean, I finished up with a magic eraser to get as much of the black marks off of the plastic and metal as possible.
The combo of those two did the best job by FAR. I was thoroughly impressed with this steamer.
Here's a look at how this section looked after I started using the steamer:
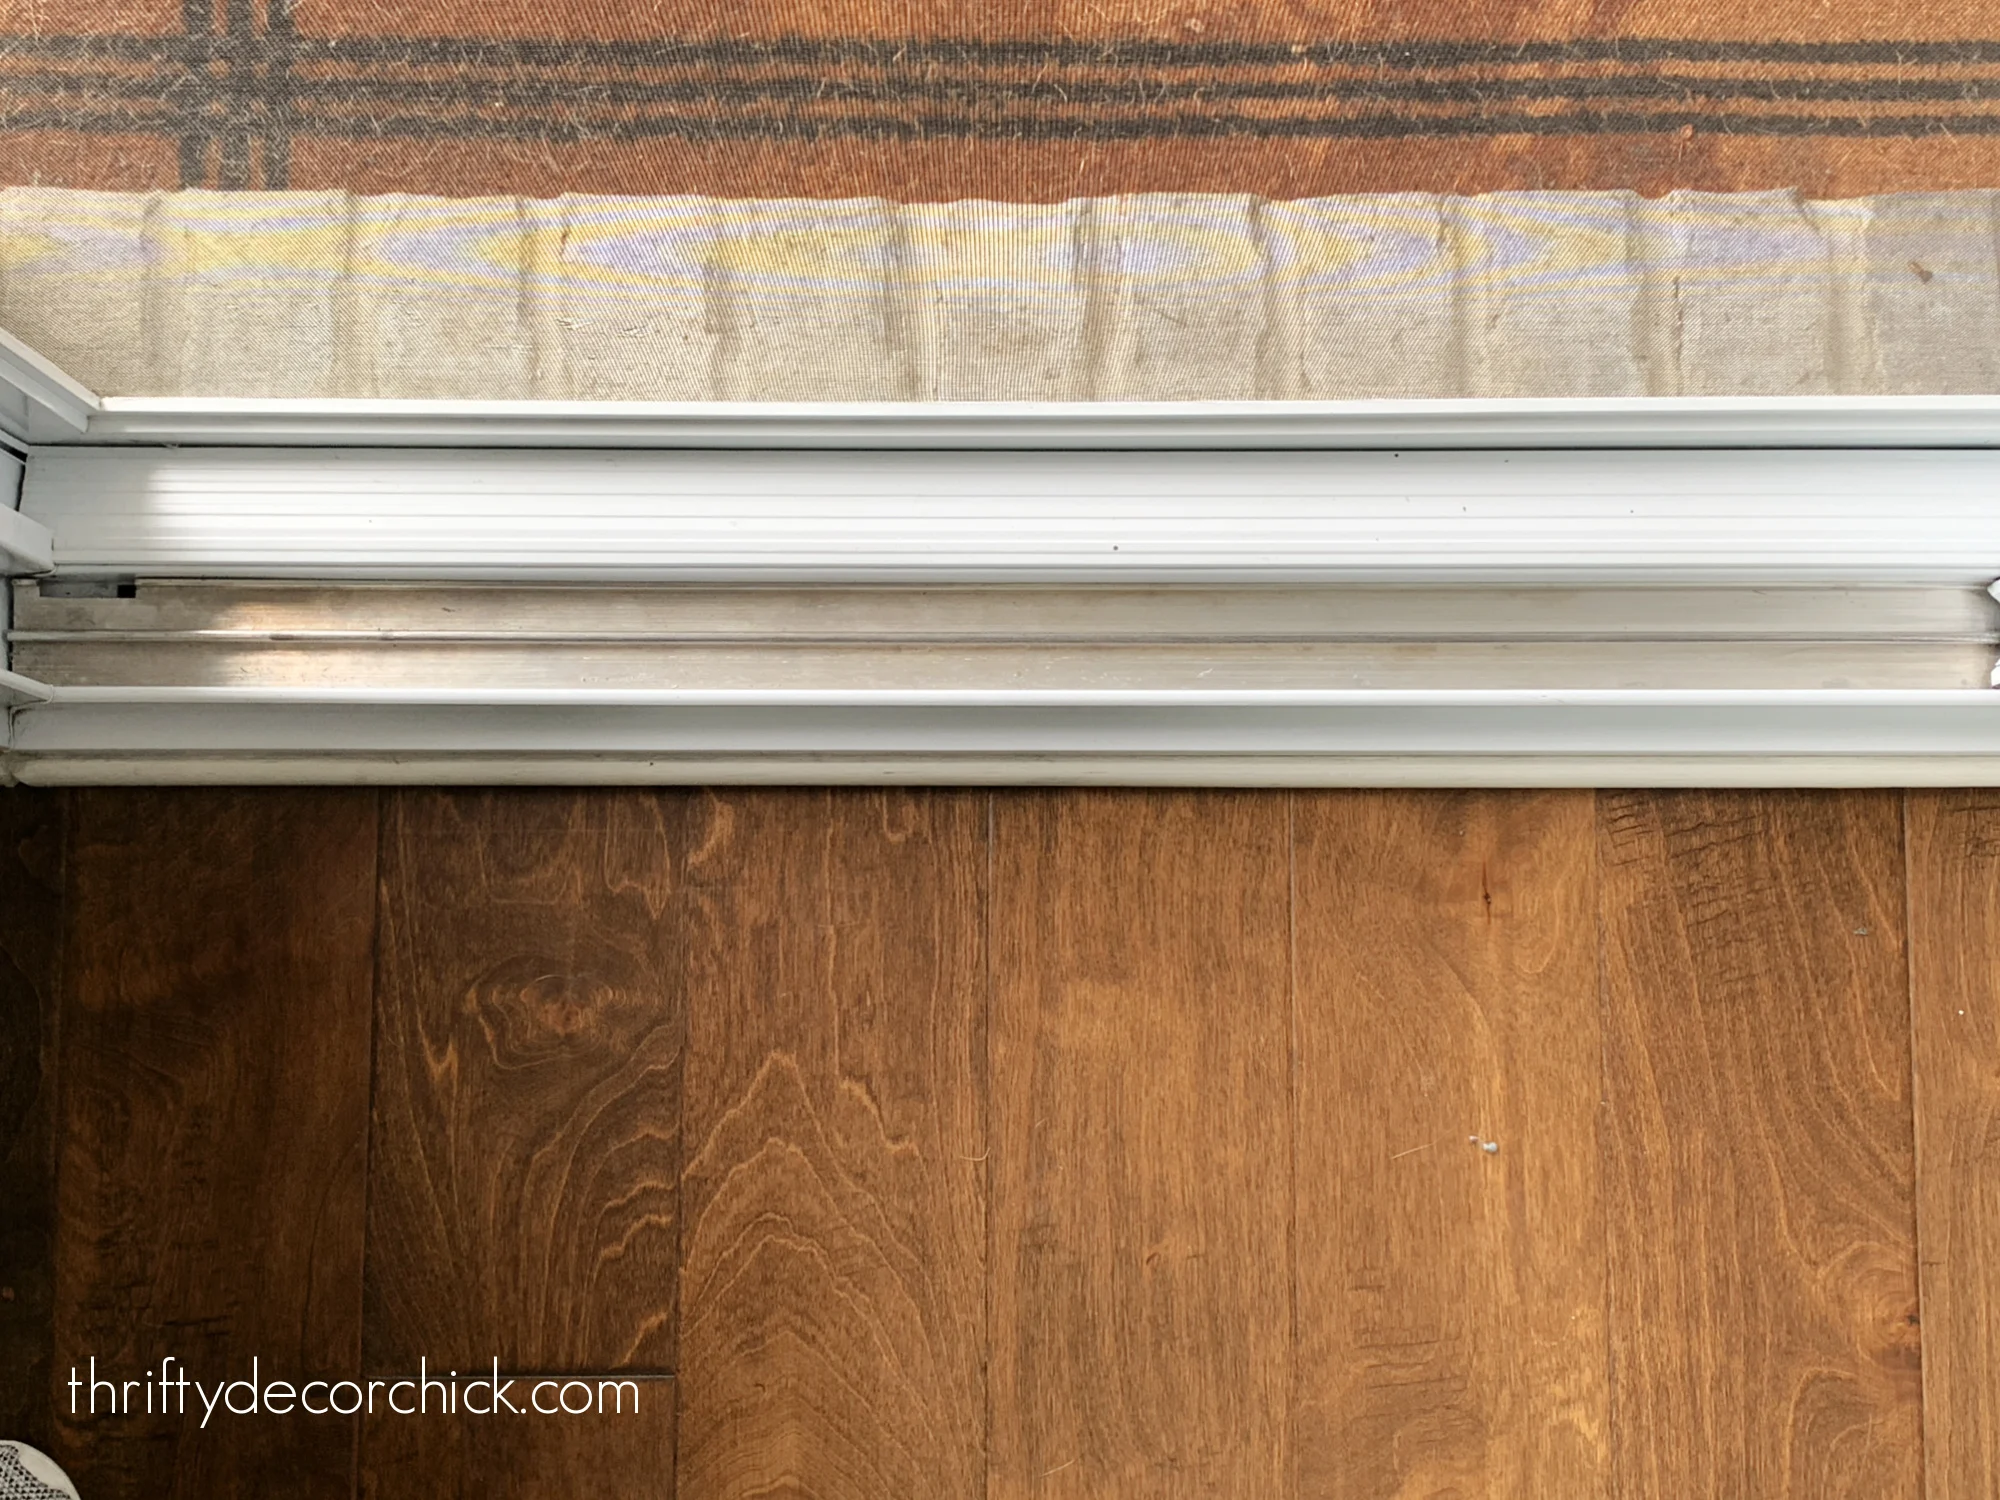
And how it looks after...clean and dry:
The the metal track where we walk in and out has some stains that won't come out, but overall this side looks SO MUCH BETTER:
Man, I wish I had taken a before pic. It was filthy.
Next I started on the window sills:
Excuse the dirty kitty paw prints. :)
Normally I'd pull the screen out, but I this one was stuck. No worries, it still turned out crazy clean!
The same cleaning combo of the steamer and magic eraser worked perfectly there too.
This little detail brush was especially helpful after it had dried:
I used that one to brush into hard-to-reach spots to get any remaining dust/dirt, then vacuumed it up.
I can't even believe how much better the tracks on the windows and doors are looking! It really is noticeable, at least to us.
Only 583 windows to go! (Feels like that anyway.)
Pros and cons of using this handheld steam cleaner:
- This cleaning tool is for adults only -- the top where you fill the steamer and nozzle get HOT.
- No cleaning solution needed -- just the steam!
- If you use the tool without an attachment, the dirt sometimes spatters. I found the more dirty a spot, the more this happened. It's easy to direct the spatters with the nozzle and clean them up though.
- I do wish it was slightly bigger with a larger water tank. I only had to fill it twice for the door track though.
- You can use this steamer for clothes too! They have a hose and fabric attachments you can buy as well.
- This is by far the quickest and most efficient way to clean the sills. It made very quick work of it -- I would have been digging dirt out of the crevices forever.
- It truly "melts" the dirt and most of the time there's no need to scrub afterwards. Just wipe with a rag.
- It's $30, but we'll use it everywhere. The car, bathrooms, even outside!
- This steamer has a long cord, which is nice if you're tackling a few windows in one spot.
I found some other interesting window sill and door track cleaning tools that looked like they may work as well! These sponges with handles look promising! And these small brushes with hard bristles look like they'd get into the small spots easily.
Have you tried one of the methods I tried? Any other great ideas you've used? Anyone had success with the sponge cutting? What did I do wrong? ;)
**See our absolute favorite pet stain remover here! And an awesome homemade jewelry cleaner recipe here.
See more of our home here.
To shop items in our home, click here!
Never miss a post by signing up to get posts via email.


I recently bought a steam cleaner and would never have thought of this. I also have very dirty screen door tracks. Thank you!
ReplyDeleteI love my steamer for jobs such as this. Glad you got one too. Makes life so much easier.
ReplyDeleteLOL!! Seems so obvious now…I have a long sliding door, and a handheld steamer (which we had bought to thaw out the junk Samsung fridge icemaker which is always freezing up). We recently cleaned it out because it wasn’t sliding well (ours is also ~4 years old) and ended up removing the doors to get it all out! DUH! next time will use the steamer…worth its weight in gold, I agree.
ReplyDeleteHi, I had to reply about the Samsung Icemaker issue! Is it the french door one? That has known issues, and Samsung has replaced ours now 2 x for free. They say this might be the last time (supposedly they have fixed the problem!). Call them! good luck
DeleteI’m replying about the Samsung icemaker too! So frustrating! We have a “kitchen hair dryer” that lives on top of the fridge for the weekly defrosts of the icemaker. Already had it serviced a few times, “nothing more they can do”.
DeleteI bought this at Amazon to unfreeze my water line on my GE side by refrigerator/freezer. https://www.amazon.com/gp/slredirect/picassoRedirect.html/ref=pa_sp_atf_aps_sr_pg1_1?ie=UTF8&adId=A10170721PCMY2D9KJKGF&qualifer=1682040008&id=7482962209294435&widgetName=sp_atf&url=%2FWater-Line-Buddy-Refrigerator-Dispenser%2Fdp%2FB07KGLHC1N%2Fref%3Dsr_1_1_sspa%3Fkeywords%3DWater%2BLine%2BBuddy%26qid%3D1682040008%26sr%3D8-1-spons%26psc%3D1. Its a frozen line tool. I also used a 1x6 piece of hard Styrofoam packing material and used double sided tape, and place in the Styrofoam, dried off the condensation andused hair dryer to dry it. Than place the Styrofoapiece inside the back of the freezer door about where the water tube would be inside the door. I still have the line freezing up but not very often. I just used that tube to unfreeze the water libe. The Styrofoam has stayed on for the past 3 years.
DeleteThis post is very timely for me. We're getting my mom's house ready to sell and I'm going to need to clean all the windows. I think I see a steamer in my future!
ReplyDeleteNice share!
ReplyDeleteAfter you steamed, what did you use to clean up the residue?
I used a magic eraser and then wiped it all with a rag. :)
DeleteThis is great! Now I need one! Ha! Please show us if/when you clean your car with it. I’m intrigued!
ReplyDeleteFor years I was able to clean the window tracks with my kids during summer vacations by simply using a toothbrush and shop vac. The kids sprayed the track with an all purpose cleaner, we start scrubbing with a toothbrush, add water to rinse with a regular spray bottle, and then keep spraying until all the goo is sucked out by the shop vac. Probably doesn't get the corners as well, but no one would see that anyways. It is fast, involves the kids, and I actually paid them $5 per track to earn money over the summer. (We had a swamp cooler, so the tracks were incredibly dirty!) This also worked great on our sliding door which always got an ENORMOUS amount of dirt in the tracks. (Mother of six, so lots of kids and friends going in and out every day.)
ReplyDeleteI use a toothbrush as well. Fun to read how you did it with your kids.
DeleteWow! Never would have thought of that! Thank you! Off to buy me a steam cleaner thingy! 😊
ReplyDeleteI have a steamer almost identical to yours. I’ve never thought to use it for cleaning window tracks. Thanks! I’m off to try it right now. They also will clean your diamond rings just like the jeweler does. Be sure to use some tongs to hold the ring so you don’t burn yourself.
ReplyDeleteWhat a great idea!!!! After reading all the comments….do a steam cleaning post please????
ReplyDeleteCan you buy the attachments separately?
One caveat: I killed a steamer by using my (very, very) hard tap water. If I ever buy another I will use distilled water.
ReplyDelete100% I've been watching the exact same car cleaning videos!🤣
ReplyDeleteI use the OXO brushes that you have linked above as "small brushes with hard bristles". They're fantastic. The last time I was cleaning windows (recently) I said to myself-if anyone wanted a tutorial, my advice is -don't bring water into the equation. Weird, right? I use those brushes and a vacuum. Do as much dry as possible, then maybe wipe any remaining dirt with a damp cloth. Chrissy
ReplyDeleteVery excited to try this, thanks for the tip
ReplyDeleteJenny and Anonymous, sorry so late seeing your replies. Jenny, thanks for the info! By the time we started having issues, we were past warranty of course. We’ve had the ice maker replaced through American Home Shield, and repaired multiple times, but finally gave up and we just thaw it out every 3-4 weeks or so. If I keep on it weekly (scraping off the ice buildup) I can go a bit longer before breaking out the steam. My mother and sister also have Samsung fridges (slightly different models) with the same problem. The fridge is great otherwise, but even as much as I love the style I won’t buy another Samsung fridge since they wouldn’t stand by it. Anon - exactly our experience too. I got ticketed that you have a kitchen hair dryer, and I totally understand haha. Our steamer lives in a cabinet above as well…
ReplyDeleteI tried the steam cleaner method and it is AMAZING!!! I used to spend lots of time with cotton swabs digging the dirt out of window track corners. This makes my life so much easier! Thanks for the tip!
ReplyDeleteWell done! I have never had anything like that - sure seems like a good "put it on the dream gift list" category! Just last week I bought my first-ever hand held cordless vacuum and am kicking myself not having one a zillion years ago. Both my adult daughters had one and I
ReplyDeletefinally had to break down to get one for the stairs. My reg vac just wasn't easy to use as it once was when I was younger. So next stop= this steamer cleaner thing. We have a lot of trees and it seems all our window sills just get soooo danged dirty. Thank you for the inspiration - that is indeed a rare thing to inspire one to want to clean something!
Steam cleaner + vacuum to slurp up the gunk.
ReplyDeleteHello - I have the same patio door and will try your technique. Do you happen to know the brand of your door? Thanks for the tips!
ReplyDeleteFormer window-maker here - I know I'm very late, but I want to respond to the concern that the steamer would damage the seal of the two-pane window units. The answer is, it almost certainly won't - you'd have to have it on pretty high heat to melt the sealant that holds the window to the aluminum spacer, and you'd have to heat the whole window pretty excessively to cause the argon to expand enough to force the butyl-covered sealing screw (usually in one of the top corners). It is possible to heat an old window that's had most of the argon escape and then have condensation appear between the panes, though, so don't sit and steam the same spot for too long just to be safe!
ReplyDeleteThe thing you really should be concerned about, though, especially on non-tempered windows, is heating the window from a very cold temperature too quickly - that's a recipe for shattered glass, so if you're going to use a steamer, wait for a warm day to do it! Also, for readers who don't know, you can usually lift the sliding part of horizontally-sliding windows and sliding glass doors right out of the track so you can clean the whole thing in one go (and not have a strip of grime in that spot the window doesn't reveal when it's pushed to one side or the other). Just be REALLY careful with them - the frame should protect the glass very well, but if you hit the corner of tempered glass, even pretty lightly, the whole thing will shatter. They can also be pretty heavy, so you may want an adult helper for larger windows or if you're not confident in your ability to move it.