How to create a layered gallery wall
December 18, 2019
Share this
I'm interrupting the Christmas decor posts for a quick DIY tip that I've used a few times over the years!
We have a table in our basement that I LOVE but haven't really decorated the way I want. I got the new table put together earlier this year and then rested some art against the wall:
This post may contain affiliate links for your convenience.
See my policies and disclosure page for more information.
Since then I've been planning to hang that art in a collage, but in a slightly different way. I got it done the other day, but took everything down so I could show you the steps! :)
(I shared that table in this post and loved it so much I got it for this spot!)
This is my almost clean slate:
I started with the longest art and hung it kind of high and to the side:
I painted that myself years ago (very similar to how I painted this art). It's just a basic canvas with a simple wood trim.
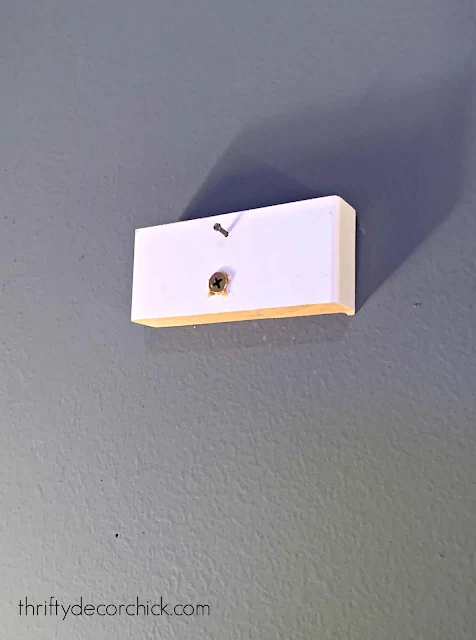
My next piece was large and square, and I wanted to layer it all a bit. To do this, I cut a small scrap piece of wood and hung it where the nail for the art would go:
I screwed it in and then put the nail in for the art. Using both keeps it from spinning around.
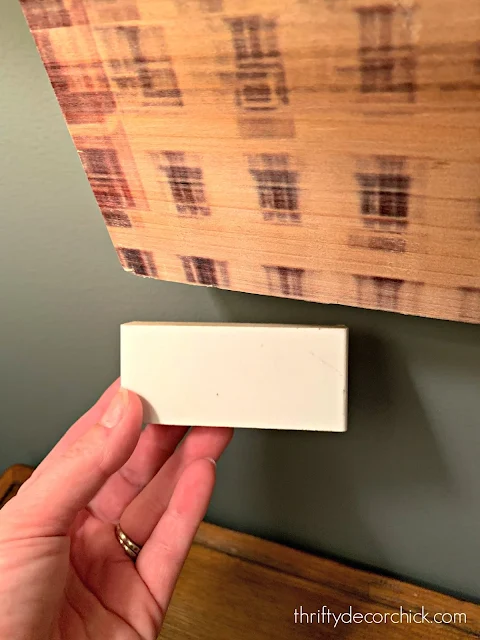
I hung that first so I could hang the second piece of art in front of the first:
You get where I'm going with this? :) The scrap wood brings the second piece to the same distance as the front of the first so you can layer them. I hope that makes sense!
If your art wobbles or doesn't hang straight you can slide another scrap of wood behind on the other side:
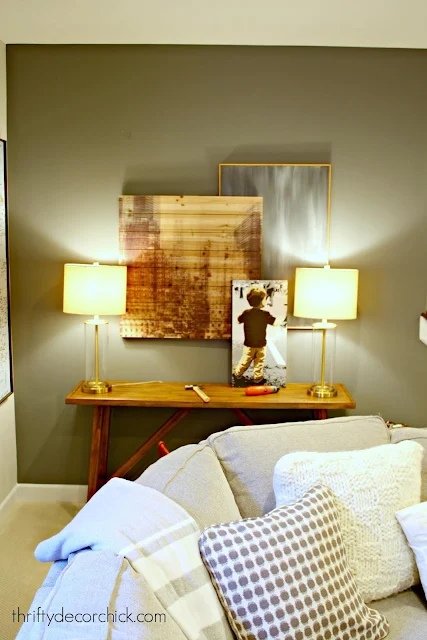
For my next piece I leaned one of our favorite art pieces (our son "conducting" the marching band) against the first two:
And then hung smaller art in the other corner. Here's the final result!:
I prefer things in threes and fives, so I tried adding one more art piece but we all agreed it was too busy.
Play around with it! I hear all the time that so many of you are afraid to hang art because of the holes in the walls. Regular nails will leave the smallest little hole that you'll never notice. I promise! There are plenty in this wall that you can't see. ;)
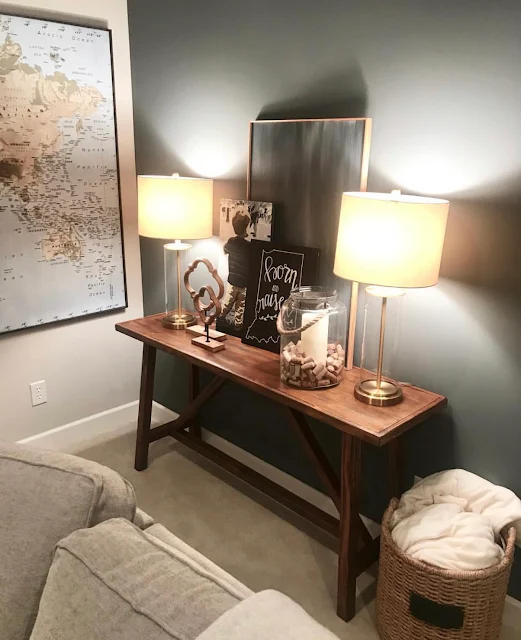
I was using art that we already had so I was able to do this pretty quick and for no money. I added some garland, lights and a few Christmas items before calling it done:
You may need to make your wood scraps thicker as you go. They allow you to keep building and layering the wall as much as you'd like. When you're creating a layered wall I recommend using a variety of sizes and placing them at varying heights.
Have any of you tried this version of a gallery wall?
I plan to be back before Christmas, but with family plans it may not happen. If I don't talk to you before then, have a very safe and MERRY CHRISTMAS!! :)
P.S. See this post to read how I hide the lamp cords! I hate them. :)
See more of our home here. To shop items in our home, click here! Never miss a post by signing up to get posts via email.


Spectacular post!!! LOVE the layered look!!!♥
ReplyDeleteSarah, This is a beautiful layered gallery wall. Like others, I do not think I have been exposed to this technique and outcome. Great idea!
ReplyDeleteI also wanted to take the time to say, Thank You for suggesting the Dewenwils Remote Control Outlet in a few posts back. I did order the Outdoor version using your link, and I can't tell you what a game changer it has been for me. Great quality, great packaging and shipping, and I am truly enjoying this item. Thanks again, and I hope you and your family have a peaceful Christmas.
This is a great idea! Thank you for continuing to share do-able inspiration?!
ReplyDelete