Five Kitchen DIY Projects That Add Tons of Character
September 24, 2019
Share this
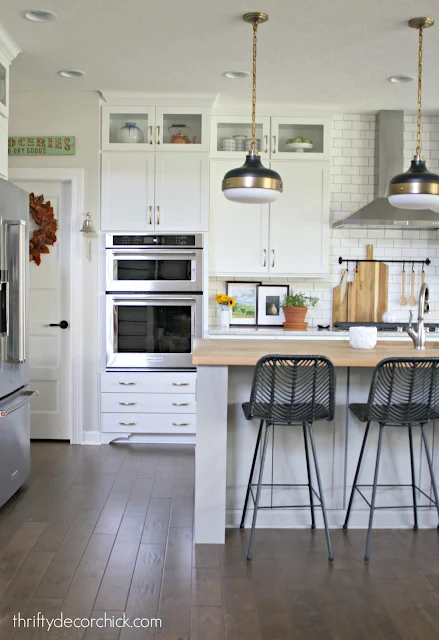
I am finishing up the fall touches around the house and thought it would be fun to share the fall decor I've added to our kitchen, along with some before and after pics.
This year I worked on a bunch of little projects in the kitchen that made a big difference. I don't think any of them were over $100 (pretty sure) and overall they added some detail to the space that I love.
I like to add character any way I can, and these custom touches are affordable ways to set your kitchen apart from others!
Let's start with the panels I added to the ends of the kitchen cabinets. Here's a look at how they looked before -- pretty standard:
I added the custom end panels to the cabinets with some wood and I LOVE the result. They look more high end and different than most:
Like my basket full of pumpkins? ;) I filled the basket almost full with kitchen towels and then added some little pumpkins to the top.
I always get asked about my rods over the stove top and on the end -- both are from IKEA!
Because I added that detail to the sides, I was able to work on another project -- adding feet to the bottom of the cabinets:
You can see how I added the DIY cabinet feet here -- it's such a little thing but I love the added detail:
I recently corralled most of the items I use when cooking (like spoons, butter dish, salt and pepper, oils) onto a tray on the counter. I LOVE having it all in one spot and it looks great too!:
This post may contain affiliate links for your convenience.
See my policies and disclosure page for more information.
This next one is something you won't notice in these photos, but I'm so pleased with how it turned out!
I took the side of our fridge that was plain before:
And added some fun storage for our big cutting boards and platters:
Goodness I love it!!
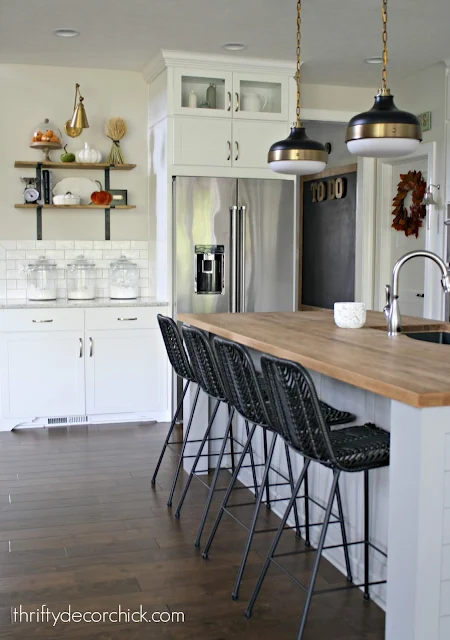
The biggest project I completed was adding on to the kitchen island. It's one of my favorite projects I've done at this house because I prefer a big, chunky island. I took it from this:
To this -- it feels so much more substantial:
This one was a bit tricky because we have cabinets that open up underneath. I wanted to make sure we still had full access to all of them, even after adding the sides that span the width of the island. It worked GREAT and was less than $100. You can see how I completed the extension of the kitchen island here.
I got new chairs (the cats were tearing up the upholstered chairs) and it feels so much more like "us" now:
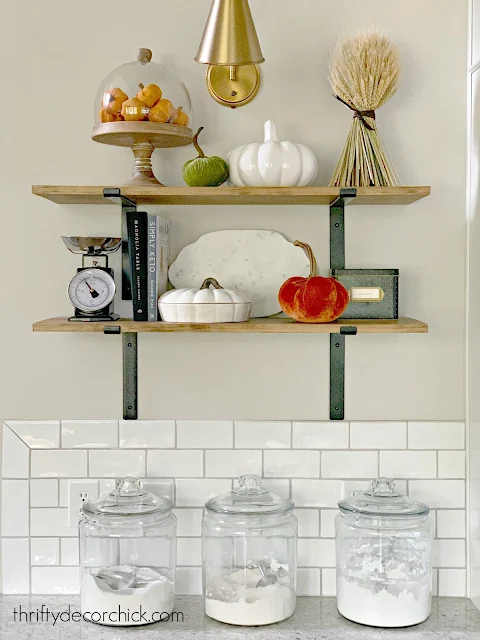
I have big plans for this wall, but for now I've had fun decorating these DIY shelves!:
It was something that bugged me at our old house too, so I did this there but never blogged about it.
You can purchase light rails (what these are technically called) for cabinets, but it's WAY cheaper to do it yourself!:
They make such a big difference! (I've always wonder why the underside of cabinets aren't painted to match.)
The DIY light rails on the bottom of the cabinets make it so you can't see them or the under cabinet lighting:
Here's a look at the kitchen not long after we moved in:
And here it is now with the DIY projects, big and small!:
It looks bigger, right? I love that island project so much. :) Stay tuned to see what I have planned next!
Have you done small projects like this that made a big difference in your kitchen? They are the most satisfying for me because they don't break the bank and didn't take long to do.
If you're wondering about any of the items in the kitchen, you can click on the photos below to get to the same or similar items!:
See more of our home here. To shop items in our home, click here! Never miss a post by signing up to get posts via email.


What a great idea! You added so much character to an already beautiful kitchen!
ReplyDeleteShelley
Finally some things normal people can do! I love what you have done with it. You stream lined it as well.
ReplyDeleteYou are my hero! You do the most amazing things that "normal" people can do. AND the price is always reasonable. I appreciate it so much. Thank you so much for sharing. I love it all.
ReplyDeleteYour kitchen is ABSOLUTELY AMAZING, I Love it. Thank you for sharing
ReplyDeleteValicia
I love all your ideas! They are both economical yet look so professionally done. Please keep changing simple designs to custom made looks. WELL DONE.
ReplyDeleteSo many nice touches! I don't get the thing with under the cabinets, either. Glad to know a solution if I replace our cabinets someday.
ReplyDeleteThanks for always inspiring me! chrissy
can you share what the name of the runner in your kitchen? i know you mentioned that its from rugsusa but overstock populates when i select the rug.. thank you:)
ReplyDeletediane from nc
Hi, can I ask how you installed the bar with hooks over your stovetop on the tile? I don't want to damage my glass backsplash.
ReplyDeleteI put the screws into the grout only -- it's held up great!
Delete