Gorgeous Wallpaper on the Office Bookcases
June 05, 2019
Share this
The peel and stick wallpaper arrived early this week and it is GORGEOUS! I'm so happy with it! I couldn't wait to show it to you.
(Edited to add: See the link at the bottom of this post for the full bookcase reveal!)
Last time I left you, this is how the room looked with the start to the bookcases:
Be sure to check out the first steps of the DIY built ins here to see what has happened so far.
This post may contain affiliate links for your convenience.
See my policies and disclosure page for more information.
Next up, I had to cut a hole for the outlet on the wall. I measured the placement and then cut a hole with my Dremel cutting tool (affiliate):
That little tool makes quick work of cutting, especially on the thin backer board on these cabinets.
I was going to have the outlet moved up to above the cabinets like I did in the last house, but decided it would be fine just leaving it inside the cabinets instead. I'll drill a hole through the countertop for lamps or any other electronics I may put there. That way...NO CORDS. Whoot!
Not having that run saved me some cash for sure. Next up it was time to install the cabinets -- which I didn't take photos of because it's basically a very boring process of finding your studs in the walls and drilling screws through the back (and sides) of the cabinets to secure them. I also connected them to each other with screws.
I'm no pro at that but it always turns out pretty well. They are in there good and aren't going anywhere. After they were in the walls I was able to start the baseboards across the front. I explained more about this in step one, but this shows you the process:
I nailed scrap wood to the toe kick I created last week, and that gives me a flush surface to attach my baseboards to. If you don't do this, the base will cave in at the bottom because there would be nothing behind it to keep it straight. I hope that makes sense!
I took the base off the back wall and reused it on the front of the cabinets. Saved me some money!
Last time I did built a bookcase like this, I used butcher block for the "counter" on top. Because I don't have a table saw, I'm at the mercy of paying someone to cut it down. Not a huge deal, but I didn't want to pay someone to do it when I knew I could make something else work on my own.
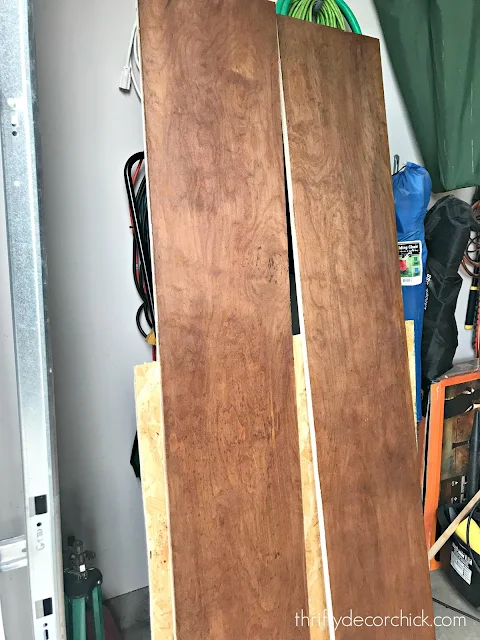
Instead of butcher block, I grabbed a 4x8 piece of birch from the hardware store and had it cut down at the hardware store. (I needed it to be 12.5 inches wide and you can't find that size already cut.) I fit them to the top (I'm using two pieces to span the 12 feet) and the seam between the two will go right in the middle of the cabinets. The seam will be hidden by the vertical wood supports on the bookcase.
I preconditioned the wood (don't skip this part, more about that here!) first:
And then stained them with one of my favorite colors, Provincial by Minwax. It goes so well with our hardwood floors:
I will get a couple coats of poly on them before I start the bookcase part of this build. The rough edge of the wood will be covered and stained as well, so you won't see the seam between the two pieces from the front at all.
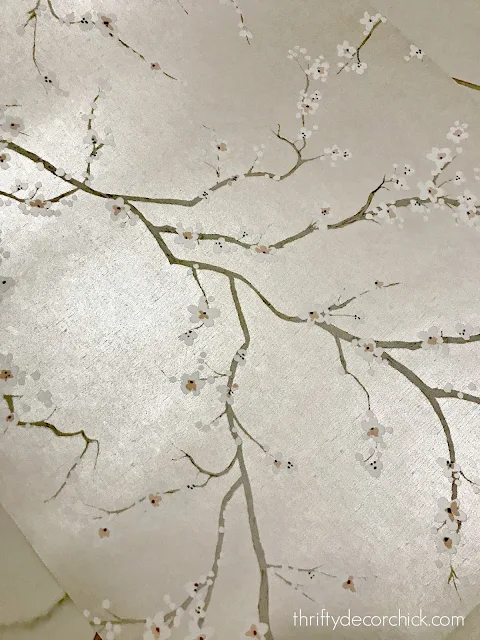
Next up...my favorite part!! The beautiful wallpaper. Last week I shared the cherry blossom wallpaper I was considering and I went ahead with it.
I wish the sun was out today because this photo doesn't truly show how pretty it is:
I didn't expect it to have some sheen to it and was pleasantly surprised. It's just gorgeous in person!!
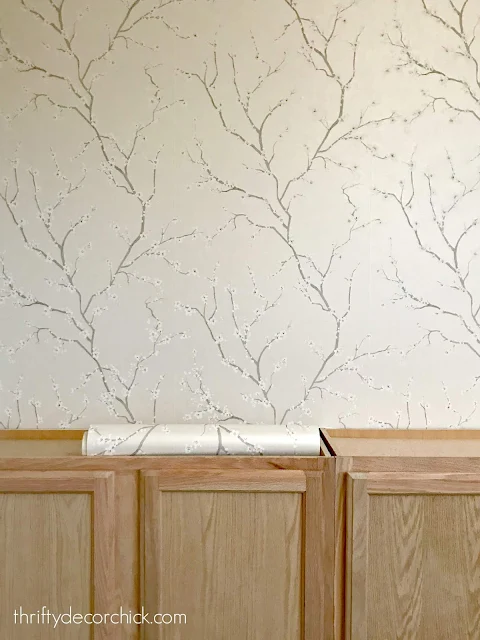
I shared how to install peel and stick wallpaper here, so check that out if you are considering this product. I find it pretty simple to install -- it goes up quickly once you get the hang of it. I ran out of time today to finish it up but here's a look at it so far:
Goodness, I wish I could express how pretty it is. It's called chin cherry blossom peel and stick wallpaper and you can also find it here! I got the pearl version but they have a few colors. I got four rolls just in case, but I don't think I'll need that many for this wall.
Here's a look at the wall last time I updated you:
And here it is now with the start of the wallpaper!:
I will install the counters after the wallpaper is done. I installed this first for a couple reasons. Well one really. ;) It is SO much easier to hang it without shelves up. I considered waiting till just the vertical supports are up, but even that would be more work.
I don't plan on changing this out for a very long time...I mean a LONG TIME. But when I do I can use a sharp razor to cut around the wood to remove it. This stuff cuts easily. But again...I don't plan on that happening in the near future.
The other reason I did it now was so I didn't have to be a perfectionist with it as I installed -- at least at the top and sides of the wall. The bookcases will cover the edges. That makes it the install much faster.
I didn't go all the way to the top because that will be a header with crown and the lights over the bookcases -- I'm trying to conserve as much of the wallpaper as possible. I'm keeping the built in color a secret...at least till I update you next time. ;) By then I'm hoping to have the bases painted.
Thanks for joining me on this process! I always strive to show you the steps along the way instead of a before and after. :) If you'd like to see this process from start to finish in our last house, you can see all of the steps here!
**See the next step (the color I picked!) here
**See the final bookcase reveal here!
See more of our home here. To shop items in our home, click here! Never miss a post by signing up to get posts via email.


I do love watching you make your house beautiful! So many tips, tricks, etc. Thanks for all the inspiration!
ReplyDeleteThis is just going to be so beautiful. Can't wait to see the finished product.
ReplyDeleteYou are amazing, Sarah - I wish I had HALF your skills!!
ReplyDeleteThis is probably my favorite project that you've ever done! I love the built-ins in your old house so much, and I can't wait to see these finished. My husband and I are not DIYers much. Too tired, mostly, but we really want floor to ceiling built-ins in our Library (aka living room). While I really like the look of the cabinets, IDK that it would give us enough shelf space for books! How would you recommend modifying the design to do some cabinets, but not all the way across? Also, we have a return air vent on the wall we'd want to use---would we have to have that moved?
ReplyDeleteOh, did you mean your birch shelf is 2.5 inches thick? Or 12.5 inches wide?
ReplyDeleteIt's 12.5 wide. :)
DeleteHow thick was your birch shelf? Did you use plywood and then put a strip on the side edge to cover? Your project turned out amazing!
ReplyDeleteI'm curious about this too! The finished edge looks thicker than the 3/4 plywood. What was the step to finish the end of the wood tabletop -- just a wood 1x2?
DeleteYes! I shared how I make them look thicker in this post: https://www.thriftydecorchick.com/2021/01/wood-counters-for-less-DIY.html
DeleteFantastic post - currently installing similar cabinets/shelves in my living room and ran into the same electrical outlet issue - did you just use an outlet extender to extent the outlet to a reasonable length? Thanks!
ReplyDelete