How to build DIY office built in bookcases
June 25, 2019
Share this
Hey there! I'm back! I'm feeling almost normal again and our kiddo is off to camp for the first time ever this week...so I'm hoping to have a lot of time to get stuff done. If I don't keep busy I'll cry. ;)
I had a few hours of energy last week in the midst of feeling like poop, so I tackled more of the office built ins. You can read more of this process by checking out the earlier posts, including how I made the kitchen cabinets look built in, the cherry blossom peel and stick wallpaper I picked and how to install it and the name of the pretty green color I picked.
This is how the wall of bookcases (well...almost bookcases) looked last I left you:
I'm SO so happy with that deep green color! It's so beautiful, especially with the wallpaper.
This post may contain affiliate links for your convenience.
See my policies and disclosure page for more information.
I love our wall color (agreeable gray) with this color scheme so it will be staying. That saves me a ton of work!
I later added the brass hardware I found here (affiliate) and it was already starting to look more finished:
They are cup pulls and traditionally go on drawers. I love them installed on the middle of the cabinet doors instead!
Then it was time to start the bookcase section on the wall. You can see how my Dad and I did that last time, but I did it differently. My hubby was out of town and I knew I'd be doing this on my own, so I went a different direction.
Because we built one big piece last time and had to lift it up into place, I had to try something different. And it worked great! I think it was actually easier overall.
Step one: Install support pieces
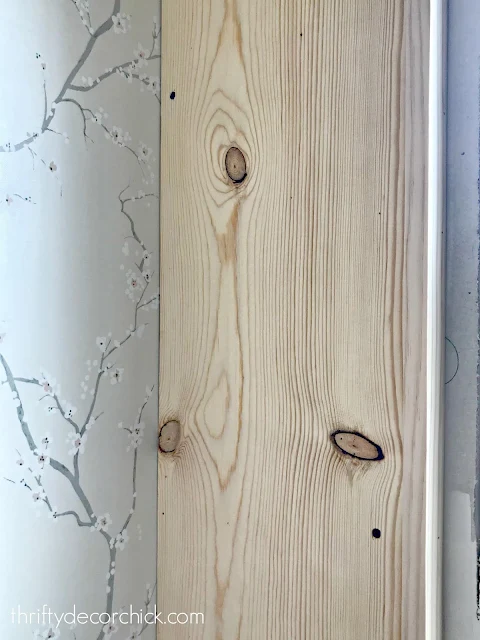
On each wall, I marked where the studs were and screwed the pine boards (1x12x6) into the walls:
For the three vertical pieces in the middle, I used scrap wood to create supports at the top of the wall. I would install one side, then nail the long board into it at the top, then attach the other support piece on the other side:
I made sure the six foot board was perfectly straight as I did this. You'll notice the boards to not go to the ceiling (neither does the wallpaper), because that part will be hidden later.
It won't seem as though the supports are solid enough at first...but each additional piece of the bookcase puzzle continues to add support and makes them more and more sturdy.
I also nailed into each board at the bottom, into the countertop:
You can't see them because I angled the nail gun. Just that additional step gave them tons more support.
Step two: Attach the header across the front
I installed two additional 1x12x6's across the front of the bookcase supports with nails and screws:
This is what I mean by each step adding making them more sturdy! Already you can't move the supports at all -- they won't budge.
An additional bit of support will happen when I close up the underside up there. I will install scrap wood along the back and front and then close it up with a piece of wood at the top of each shelving unit.
Step three: Add finished trim to front
After the header was up I went ahead and added the 1x2 trim to the front of the supports to beef them up and hide unfinished edges:
It went SO fast...I kept saying under my breath that it was too good to be true. Usually when I think that to myself, something bad happens, but it continued to go smoothly!
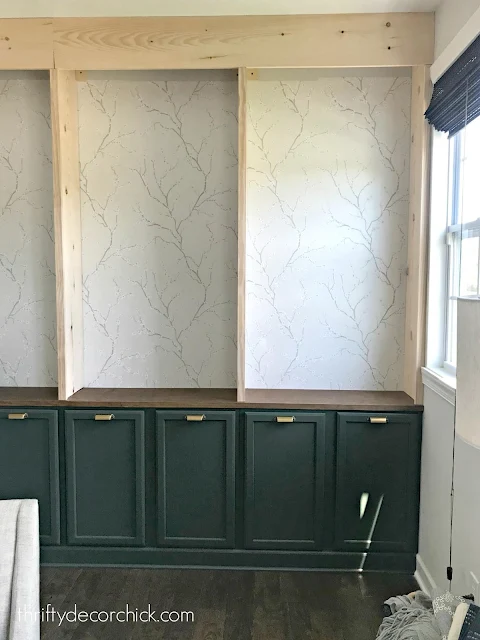
Here's where I'm at so far!:
This is the thing that I try to emphasize every time I take on a large project like this...you don't have to do it perfectly. A professional carpenter would balk at my method, but that's OK. :)
The final result will hold up to just as much and will look great! After I add the wood under the header, I can start painting the bookcase. I'm trying to break up the painting as I go so it's not so overwhelming at the end.
The final part of this build will be the most expensive and time consuming and that is the shelves. The addition of the shelves (that will be secured into the walls and the supports) will add that final bit of support. As I said, every step of the process makes them more secure.
This guy already loves hanging out on here. He's like, come on Mom, finish so I can climb all these shelves will ya??:
I just noticed his eyes match the cabinets. 😍
Here's how it looked when I started:
And here's where it is now!:
Even though the shelves will take some time, they aren't difficult. After I get this part painted I will be SO CLOSE to done!
Overall this build has gone much faster than last time I did this, even with illness that sidelined me for two weeks. If I work on it as much as I hope to over the next week, I think I can be done by early July.
Thanks for joining me on this DIY process! It's been a blast to work on! If you have any questions that I haven't covered, feel free to ask in the comments.
**See how I added lights to the bookcases without electricity here
**Want to see the final result? Check out the bookcase reveal here!
See more of our home here. To shop items in our home, click here! Never miss a post by signing up to get posts via email.


Oh i love this. It is really coming along so beautifully. Can't wait to see it all finished.
ReplyDeleteWow! I have subscribed to your blog since you were in your other home.. I am amazed at the changes you made in that one and what you're doing in your new one.. You have a knack of taking a 'house' and turning it into your 'home'..
ReplyDeleteI love the changes and your expertise: especially with the wood built-in projects..
If you're ever in New Hampshire (hint, hint) I could use a few pointers! lol!
And love the kitty...He looks so sweet sitting there..But we know in cat language he's claiming it as his own...
Question-for the three center supports that are sandwiched between the scrap wood-is just one piece of the scrap screwed into the stud? How is the other side staying secure into the wall? Thanks!
ReplyDeleteHello! There are scraps on either side of the supports, but I nailed it into the one before installing the other side, if that makes sense. One side of the scraps hit a stud most of the time, which surprised me. It's really just to get the supports steady and straight, the shelves later will REALLY attach these to the walls. Hope that helps!
DeleteI think that makes sense. And I also noticed that the supports are all equal distance between each other-did your studs just happen to lay out that way as well? Sorry trying to figure out how I can do these as well!
DeleteLove, love, love these. And your process. I can't wait to see everything finished.
ReplyDeleteThis looks so easy it makes me want to try it! I can't wait to see the rest of it. I love the cabinet color, the hardware, the wallpaper, your cat and think it will be so gorgeous when finished. I also think you are a genius! Amazing the way you figured out how to do this. So much easier than the dining room at your previous house. Your house was beautiful as built but you have made it fabulous!
ReplyDeleteLooking good, cnat; wait to see the finished shelves. Love your cat btw!
ReplyDeleteHow did you finish the front edge of the plywood countertop?
ReplyDeleteYou can see how I do that at this post: DIY wood countertops
DeleteHi, I love this bookcase so much - and your helpful tutorials - that I'm in the process of building one in my home. There is one thing that I just don't understand: the cabinets are 12" deep, the wood top on the cabinets is 12" deep, and you say you're using 1x12x6' wood boards for the bookcase sides and for the shelves. But in the photos, it look like the wooden counter top is an inch or so deeper, because the sides of the bookcase don't come all the way to the edge of the counter top. Is it just trim around the counter top that gives it the overhang / depth?
ReplyDeleteThanks for everything you share!