Customize a Kitchen Island With These Easy DIY Updates
March 19, 2019
Share this
How to customize your builder grade kitchen island with DIY updates.
There are so many ways to add character and function to your basic kitchen island!
I've done so many kitchen island makeovers through the years, from adding trim to changing out the countertop. They've all made a big difference!
It's such a great way to add a custom touch to a kitchen.
Islands are such a focal point and I've found with most of my projects that it doesn't take much to make them really shine.
Islands are such a focal point and I've found with most of my projects that it doesn't take much to make them really shine.
Forever ago I added beadboard to our island and then painted it black.
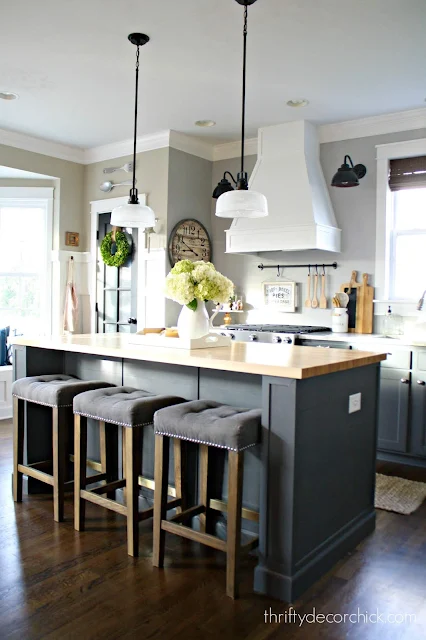
Later I replaced our laminate counters with butcher block from IKEA and installed board and batten over the beadboard:
Never underestimate the difference just changing out the island countertop can make!
When I started our kitchen renovation at that house I knew I wanted to make a bigger change.
We moved our dining table over so that meant we could create a much bigger island.
I added on to our small island and extended it from the side and the front. It always looks worse before it gets better!:
This post may contain affiliate links for your convenience.
See my policies and disclosure page for more information.
The finished result was a MUCH bigger island with tons of storage:
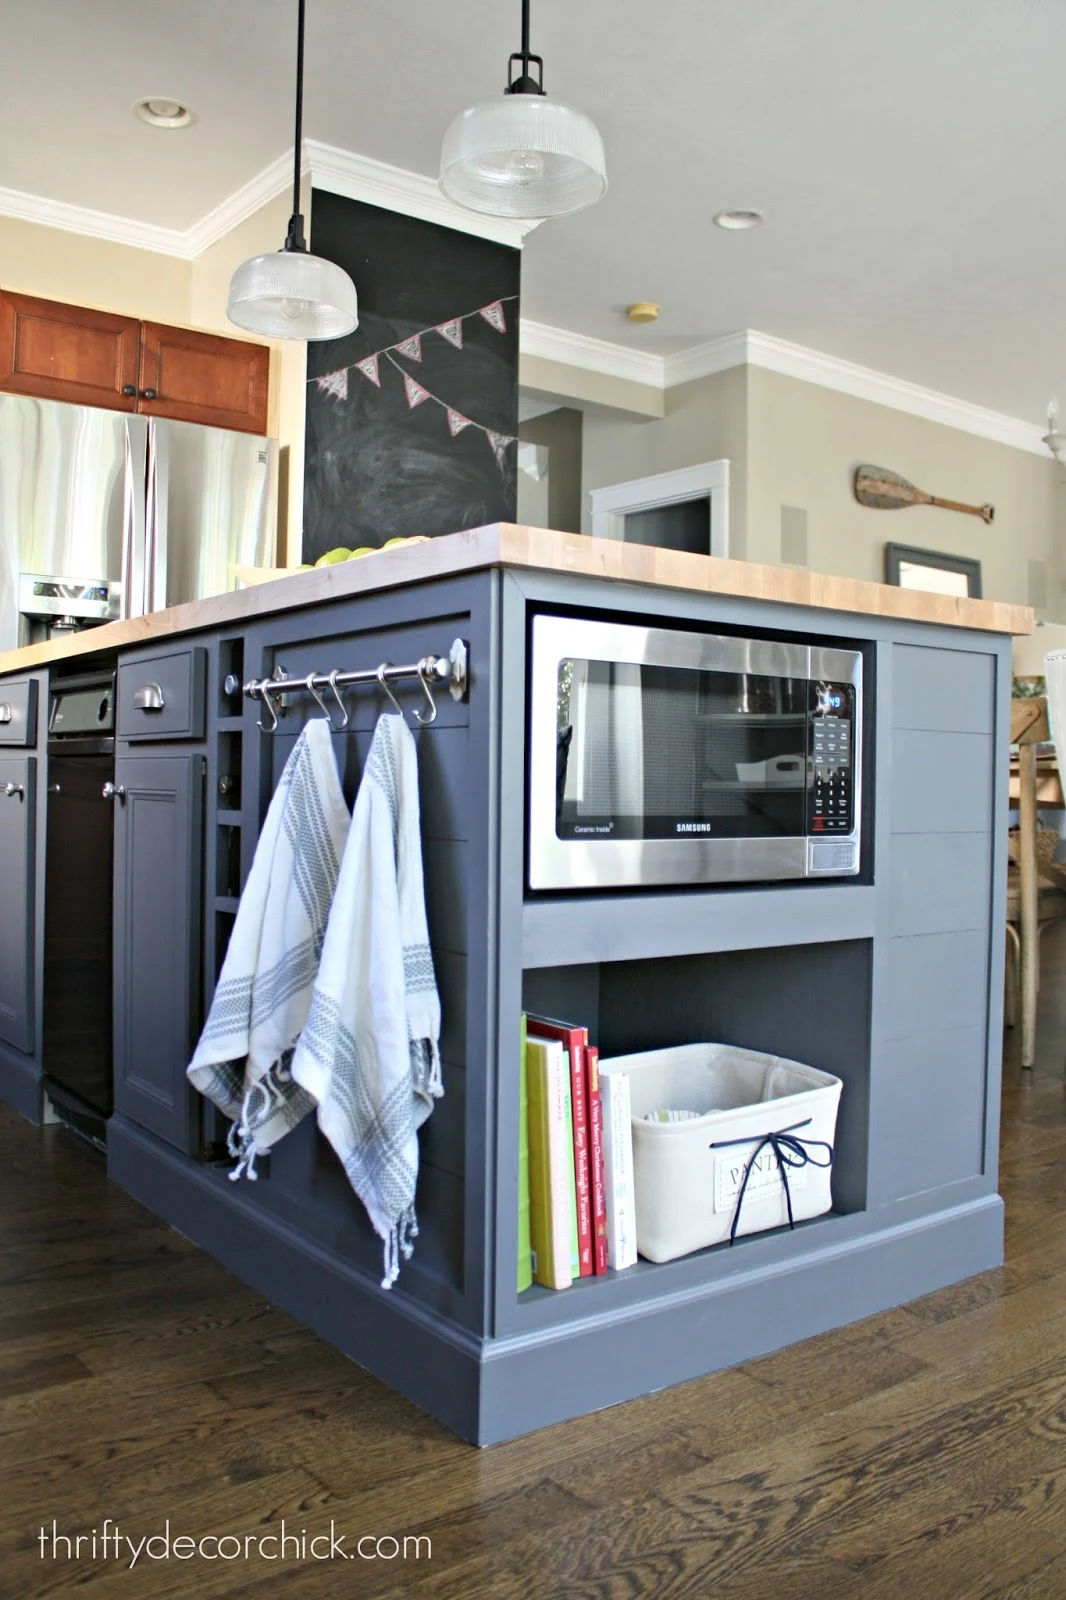
I added a wine rack, new butcher block counters and storage space at the end:
One of my favorite parts was the rod with hooks that held dish towels:
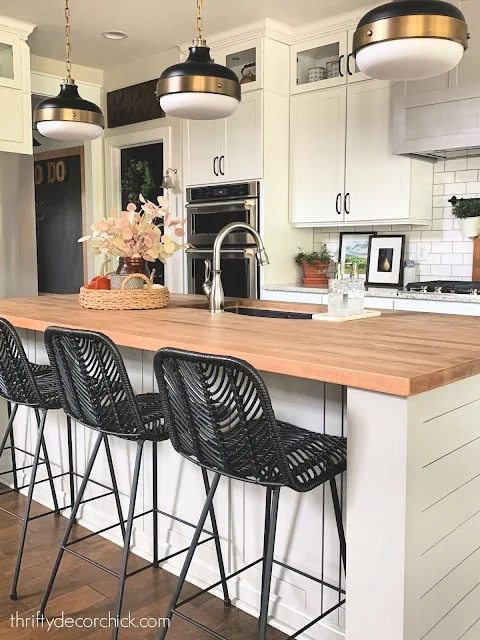
In our new house I knew I wanted to repeat the wood counters we have a HUGE island now that we LOVE.
It is pretty basic as far as the cabinets and design. Last year I added a small detail to the ends of the island to dress it up a bit:
Here's another idea to extend the island underneath and add more open storage with shelves:
This island had an overhang at the end that didn't leave much room for stools. I love using it for pretty open (or closed!) storage instead.
I've known from before we moved in that I'd eventually add to it...but like most of the big projects I tackle, I wanted to wait it out to figure out exactly what I wanted to do.
I'm so glad I did! I knew I wanted to add some kind of "legs" to the island, so I've been searching for ideas for over a year. I prefer some kind of base under the counter -- the design we had on the old island with the thicker sides is my preference.
I thought it wouldn't be possible because we have the cabinets underneath with doors that open. We don't have to access them often, but I do love the extra storage.
I thought about adding legs, but instead came up with a new plan! I'm planning to start that DIY kitchen island project this week.
Update! Check out how I extended the sides to the front of the island here:
It has so much more visual impact now, and the simple shiplap on the side was an easy touch.
I've got a bunch of great island transformations from other talented bloggers to share with you as well!
These island ideas run the gamut from modern to traditional style kitchens. All of them are beautiful examples of ideas you can incorporate in your own home!
I love when a kitchen island is customize to look like a piece of furniture. This is one of my favorites -- what a beauty with those big, chunky legs!:
I've found recently that you can find some great wood leg options on Amazon. I love how long this island is too -- and that pretty light gray color.
This tutorial on how to add legs to your island is so helpful as well:
Nicki's island looks fantastic with those chunky legs -- this is a fairly easy DIY project that really adds a custom touch to your kitchen.
Try adding corbels under the counter or decorative cabinet feet under the cabinet bases to dress up your island as well!
I love this one because it is absolutely a doable DIY project -- if you don't have an island built in, why not build one you can move? This simple version would still hold plenty of stuff:
I've always thought my DIY potting bench would make a beautiful island, especially with the wheels!
We added a microwave to our island as well -- I added an open shelf at the end with an outlet. It was one of the best changes I made to our kitchen!
This was a great idea too -- they added onto their island and now have a table in the kitchen:
I almost did something similar in our old kitchen years ago -- I was very close to extending out the countertop so we could have seating off the island instead of in the bay window area.
This was a great idea too -- they added onto their island and now have a table in the kitchen:
The Cofran Home
I almost did something similar in our old kitchen years ago -- I was very close to extending out the countertop so we could have seating off the island instead of in the bay window area.
If you're tight on space this is such a smart option!
If you have a sink or stovetop in your island and don't want people to see the messes (or just want more eating area), this is a great way to do it:
They added on to their existing island and built a taller bar top with granite. The added molding makes this look like a custom piece!
If you don't have an island, there are many ways to create one with store-bought kitchen cabinets:
It would be fun to customize one to exactly the size you want and your needs!
You don't always need cabinets to create an island where the wasn't one. This table became a lovely island and can be rolled out of the way if needed:
I just love that pretty detail on the ends of the table! And the long towel bar is a perfect touch.
Jennifer found an old sewing table that ended up being a lovely kitchen island as well:
Isn't that pretty? Because it's a smaller size the counter wouldn't be too horribly expensive.
And finally, don't underestimate the power of paint and new hardware -- they can completely transform an ho hum kitchen island!:
If you're loving a dramatic color but are afraid to incorporate it on the walls or ALL of the cabinets, add it to your island. I think the island should be one of the show pieces of the kitchen and this is a great way to accomplish that!
If you have a sink or stovetop in your island and don't want people to see the messes (or just want more eating area), this is a great way to do it:
They added on to their existing island and built a taller bar top with granite. The added molding makes this look like a custom piece!
If you don't have an island, there are many ways to create one with store-bought kitchen cabinets:
You don't always need cabinets to create an island where the wasn't one. This table became a lovely island and can be rolled out of the way if needed:
I just love that pretty detail on the ends of the table! And the long towel bar is a perfect touch.
Jennifer found an old sewing table that ended up being a lovely kitchen island as well:
Isn't that pretty? Because it's a smaller size the counter wouldn't be too horribly expensive.
And finally, don't underestimate the power of paint and new hardware -- they can completely transform an ho hum kitchen island!:
If you're loving a dramatic color but are afraid to incorporate it on the walls or ALL of the cabinets, add it to your island. I think the island should be one of the show pieces of the kitchen and this is a great way to accomplish that!
Liz needed a kitchen island but couldn’t find one that was the right size. So they found a sofa table and transformed it:

Awesome!! It looks so custom. And check out that gorgeous kitchen too!
Great transformations, yes? I love seeing what my fellow bloggers accomplish with some sweat equity.Have you added any custom details to dress up your kitchen island?
Never miss a post by signing up to get posts via email.


Ahh, dreamy kitchen islands! My tiny apartment in Hong Kong is WAAAY too small for one (we barely even have a galley kitchen... we don't even have counter space haha) but it's my dream to own a kitchen with an island one day! 💕
ReplyDeleteCharmaine Ng | Architecture & Lifestyle Blog
http://charmainenyw.com
The painted islands are gorgeous! While I really like the look of "legs" on an island, I prefer having the extra open space on the ends to be able to move into and out of the seats.
ReplyDelete