How to easily hang pasted wall paper
February 06, 2019
Share this
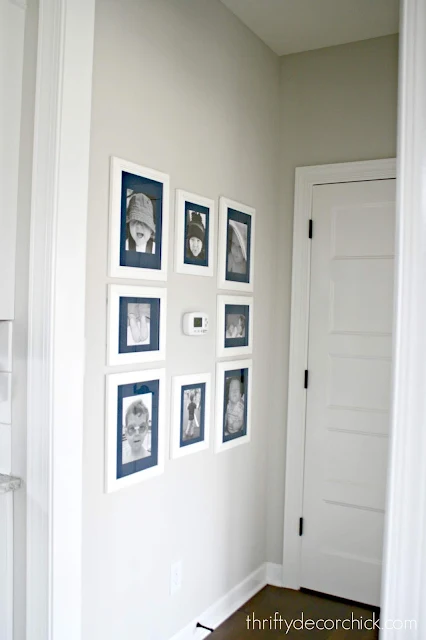
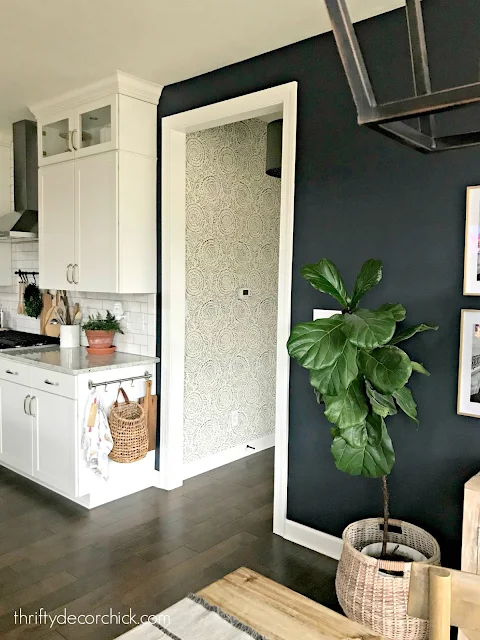
Remember this little hallway off our great room and kitchen?:
That's the pretty paper -- isn't it lovely?
This process was MUCH easier than I thought it would be. Much.
1. I measured the length of the wall and laid the paper on the floor to measure. I would draw a line where it needed to be cut:
See more of our home here. To shop items in our home, click here! Never miss a post by signing up to get posts via email.
I shared more about that little gallery wall and my hanging trick here.
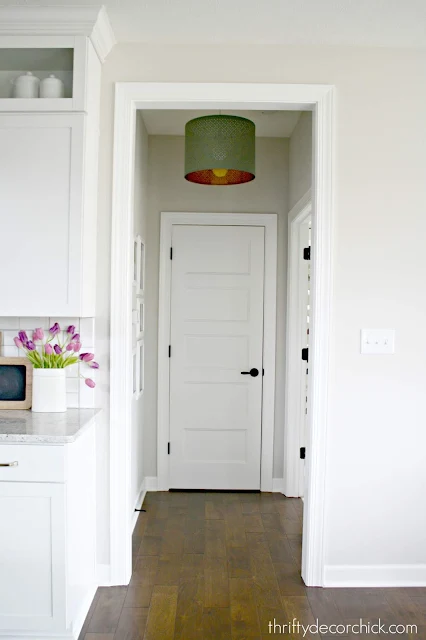
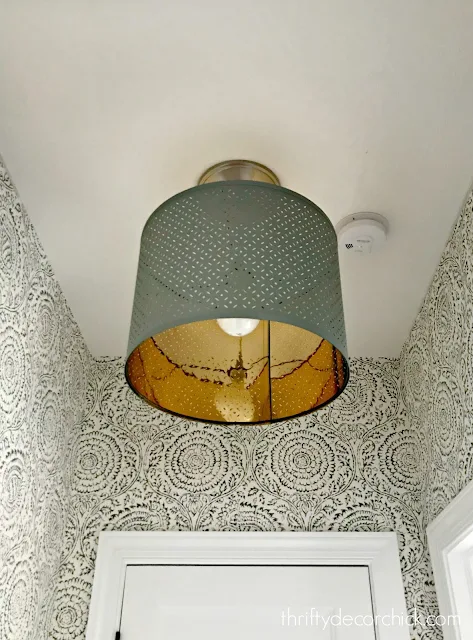
Later I showed you how to change out a recessed light for a hanging light:
This post may contain affiliate links for your convenience.
See my policies and disclosure page for more information.
I've had big plans for this little hallway and that involved wallpaper. The real stuff -- not peel and stick wallpaper like I used in the powder room. I've only done smaller projects with it, like this wallpaper art I made YEARS ago.
Back then you had to soak it in water (I used the tub), then do the folding technique before hanging. It wasn't difficult, but it was messy.
Well, I've been eyeing a wallpaper forever and a few months ago I started the process if figuring out where to get it. I asked on Instagram if anyone knew what it was called or where I could get it, and people were SO helpful!! That was the good news -- the bad news is it was sold at Anthropologie for nearly $300 a roll. Three hundred! A roll! I'm willing to splurge occasionally, but that was pushing it.
Some of you helpful folks gave me the name of the wallpaper and other places to purchase it. I did some more research and found it for more than half off at an online store. I bit the bullet and bought a roll because that was the best price I found by far. If you purchase from Anthro, it's called Pergola, but the official name is Kamala Indigo Baker Lifestyle (this one is WAY less than the Anthropologie option). Search the "real" name for it latter online.
I really wanted to get it up before the holidays, but thought better of trying to tackle it at that time. And then I just psyched myself out. I thought it was going to be a real pain to install, so I waited on it. (This waiting will bite me in the butt, I'll explain more about that in a minute.)
Finally this week decided, I'm just gonna do it! I actually read the directions (always helpful) and realized it wasn't even pasted. Then I talked to my friend Beth who had recently wallpapered this beautiful room, and she explained that you roll the glue on the wall instead of getting the paper wet. SO MUCH EASIER.
Here's a quick run down of how to install wallpaper...
You'll need wallpaper paste and a roller and/or brush, then a very sharp utility knife and a wallpaper smoothing tool:
That's the pretty paper -- isn't it lovely?
This process was MUCH easier than I thought it would be. Much.
1. I measured the length of the wall and laid the paper on the floor to measure. I would draw a line where it needed to be cut:
2. Then I cut with scissors. I found that you don't have to have super straight lines because you'll be trimming the wallpaper at the top and bottom (and some sides -- especially for a smaller space):
3. You'll pour your paste into a paint tray, then roll it on just like paint. Makes sure to use a brush to get into tight areas like around doors, the ceiling and the baseboards. Don't skimp on the glue! I had to go back over some areas because I didn't use enough.
4. The glue has some give, so you can adjust the paper. I slightly overlapped the pieces, just like I did with the peel and stick in the bathroom. I do this just in case over time it expands or contracts for some reason. You'll want to make sure you match up the design with each new piece.
5. Use your smoothing tool to work out any bubbles. There were waaaay less bubbles to worry about with this compared to the peel and stick. The tool also gets the wallpaper to stick well to the wall:
6. You'll also use that tool to trim your wallpaper. Push the wallpaper to where you need to cut (the ceiling, door trim, baseboards) and use your razor to trim it down:
That little took makes this super easy! I would hold it against the wall and drag the razor as I moved it. You definitely need a sharp razor though.
7. Because of the repeat of the wallpaper (repeat is the size of the design that repeats throughout the wallpaper -- similar to fabric) you need to make sure to match that as you go. That means you'll have plenty of excess paper and why you need to make sure you order enough!
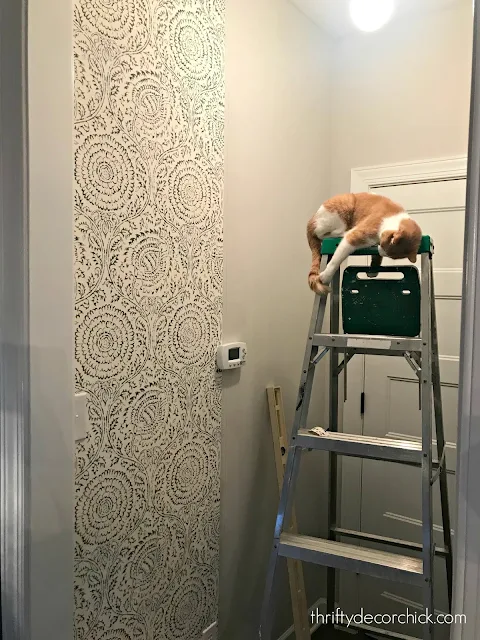
As soon as I got one piece up I knew it was going to be good!!:
Ignore our crazy cat. It was addicting, and dare I say...kind of fun. You know I'm weird and I enjoy DIY projects...but it was satisfying to see the progress.
We all absolutely positively LOVE it:
I want it everywhere!! In every room. On the ceilings. Ever.y.where.
This is where I tell you to do as I say, not as I do. I thought for SURE one roll would be plenty for this small space. The repeat on this isn't that big so with that and the small amount of wall space, I thought I would be good for sure.
Nope. This view is cropped:
I'm short two small pieces. SO frustrating. It's because of the two doorways -- those long skinny pieces make a lot of the paper unusable because the remaining pattern doesn't match up. So I have plenty left, I just can't use it. Poop:
Bad news is I have to order more, the good news is I love this paper so much I'm going to use it somewhere else...so I'll definitely use it!
**Edited to add: Many of you have suggested piecing parts of the paper together -- I definitely did that in other spots and you can't tell at all. The portions of paper I have left are very skinny (and don't match the pattern) or are the middle sections of the paper (because I cut the sides for the areas by the doors). That middle part is unusable because the pattern doesn't match up. I tried everything, believe me! :)
Here's a view from the finished side. ;)
It's wild how it makes the ceiling seem so much taller -- it feels ten feet tall here! (It's not.) Overall it makes this tiny little space feel so grand. I'm 100 percent obsessed with it. Lurve.
I couldn't have found a more complicated space to wallpaper -- three doorways, an outlet, a light switch and the thermostat. I'll share more tips at the end of the post so be sure to check those out!:
Of course this one change has turned into a few more that I want to make -- I'm so excited about the additional details I'm hoping to finish up this week! One of those is a new shade on the light. Stay tuned for the rest!
The photos will go back up too, but I'm hoping to make some slight changes:
The online store that I bought the wallpaper from doesn't carry this one anymore. I'm praying the new roll (from a different batch) matches well enough. Gah! That's another reason to make sure you get enough!
Here are some additional tips if you plan to install wallpaper in your home:
- Use the wallpaper calculator they provide online -- and if you have a lot of doorways I'd err on needing even more. I mistakenly thought that would mean I wouldn't need as much.
- I used a level and marked a straight line down the wall so I could use it as a guide to make sure the wallpaper was going on straight. Your first piece is the most important!
- Like I said before, don't skimp on the paste. Don't leave globs of it on the wall, but make sure your brush or roller is saturated and go over the wall a couple times.
- Don't be afraid to get the paste on the paper. It wipes off easily. I used extra amounts where the seams me up and then wiped it down after.
- You can measure (very carefully) for outlets and things in the way and cut the paper before install. But I wouldn't recommend that. You have to make too many tiny adjustments as you go. I started at the top, got it straight, then spread it onto the wall. As I came to something that was in the way, I would cut around it. The outlet and switch were easy (take the covers off). For the thermostat, I tucked the paper behind as much as I could and then would cut around. Make sure to take your time here and make small cuts as you go.
- Wallpaper is surprisingly forgiving -- there are parts I pieced together and you can't tell at all. You'd have to get right up on it and feel the wall to know where I did it.
- Feel the wall as you go over it with the smoothing tool. I couldn't see the air pockets well because of the design.
I find that that more I work up a DIY project in my head, the less difficult it really is. Do you ever notice that? The ones I think are going to be the hardest end up being way easier than I thought. Maybe it's just because I'm comparing them to how hard I think it's going to be. ;)
This is my favorite spot in our house right now!
Have you installed wallpaper in your home? It is back with a vengeance and now I know why. ;) I am head over heels in love. I could see myself adding it all over but need to watch it -- I've heard it is NOT fun to remove!
If you have any questions about the process feel free to ask in the comments! Now I need to go order more of paper so I can finish that dang spot. 😩
See more of our home here. To shop items in our home, click here! Never miss a post by signing up to get posts via email.






Looks amazing. Since the remaining area is in a corner and the repeat is small can you cut a straight edge along the remaining skinny pieces and patch a few pieces together? You likely would never see it.
ReplyDeleteI wondered the same thing. I've wallpapered a lot and have had to get creative with matching leftover pieces to save buying another roll, but it can be done, and would not be noticeable at all up high and in that corner.
DeleteI wish! I tried everything. Most of what I have left is a section that runs down the middle (from cutting the area by the doors) so the pattern doesn't match up at all.
DeleteI am so impressed - and it looks incredible!
ReplyDeleteShelley
Hey Sarah! Looks great! I hung paper as a side job for about 20 years, it’s not for everyone, but if you’re a perfectionist this is the job for you! One note, the reason you should paste the paper versus the wall: when you paste the paper, you book it, fold it wrong sides together after pasting, this gives the paste time to set into the paper a bit and gives you a better hold over time. I know it’s messy and you need the space to do it but it’s better for the paper overall. Also, with what little you have left to do, and because it’s in a spot that won’t get noticed as much, you could certainly patch it together with small pieces. But just take your time, don’t overlap at all and it will be fine. Definitely been there when you run short, it stinks! But you did a nice job, looks great@ Enjoy the fruits of your labor!
ReplyDeleteThank you!! Most of what I have left either is too skinny (and there's not enough to cover that part because of the pattern) or it's the middle section (from cutting the sides for the doorways). The middle part of the pattern does't match up. I tried everything. :)
DeleteLove it!!! I was just thinking the ceiling looks so tall right there!! You did a great job!!!
ReplyDeleteNow I want this paper! Beautiful!! What is the dark blue color that you used on the walls outside of your hallway? I am very very impressed with your DIY skills. I kind of idolize you :-) But not in a creepy way. Don't worry!
ReplyDeleteHaha!! It's called cyberspace, you can see the whole room here! https://www.thriftydecorchick.com/2018/10/dramatic-dining-room-makeover.html
DeleteI have used wallpaper quite a bit. Just like distinguisheddzns (above), I always paste the wallpaper instead of the wall. I also prepare the wall beforehand by applying sizing to the wall. The sizing, as well as pasting the wallpaper, makes the wallpaper extremely easy to remove...I have never had a problem removing wallpaper using my method. I also draw out a room on paper and mark how the sheets of wallpaper will go on each wall. That helps verify that you are ordering enough wallpaper...knowing how the wallpaper will meet the windows and doors shows you the waste that you will have.
ReplyDeleteThis wallpaper is very pretty!
I am curious about the dark paint color in the kitchen around the door. can you tell me what color that is? Thank you
ReplyDeleteIt's called cyberspace! You can see that makeover here... https://www.thriftydecorchick.com/2018/10/dramatic-dining-room-makeover.html
DeleteI remember when wallpaper was ALL the rage...I also remember having to remove it...ugh! When I bought my house 20 years ago I was given a "wallpaper allowance" but I didn't want a drop of paper in this house! Nice to see it is making a comeback...it can really dress up a space. But if you are someone who likes to change your decor often, don't wallpaper! It can be a wench to remove and as you noted it can be pretty expensive compared to paint.
ReplyDeleteAs others have said, you can probably patch together small pieces above that door. I remember a kitchen my mom and I wallpapered where we ran out near the end. My mom patched together so many small pieces, but the only way you could tell was by running your hand over it! I would definitely try that before risking a dye lot difference.
ReplyDeleteLOVE! Just saw a photo on Instagram of a wallpapered ceiling. Since I don't have a small area to wallpaper, I could definitely do my laundry room ceiling. Thanks for sharing!
ReplyDeleteLove, love, love!!!
ReplyDeleteI'm thinking about adding wallpaper to our bathroom reno, but it's a small-ish windowless room, so I feel slightly apprehensive about the steam causing it to peel off. Do you think that's likely? Would it help to extra paste it?
ReplyDeleteMany, many years ago I wallpapered a kitchen and bathroom. I used a vinyl wallpaper for both. If you're worried about steam you might need to upgrade your bathroom fan.
DeleteI love the wallpaper! I have wallpaper in a couple of rooms in my house, although I didn't do it myself. One thing the installer did was wallpaper my light switch and outlet covers (where it would fit in the pattern), and it makes a huge difference!! They blend into the walls and it doesn't break up the pattern.
ReplyDeleteIt looks great! You could use the extra in the back of the glass front cabinet in your kitchen...since you have to order more anyway :)
ReplyDeleteI've been wanting to wallpaper our guest bath and now that you have explained how easy it is compared to how hard you thought it would be, I'm sold. I love that pattern and it really dresses up the space. Dear Lillie used to wallpaper her closets and pantry. I'm thinking I might try one of those first to get the hang of it before doing a large space. Thanks for the tips. It looks fabulous!
ReplyDeleteI wallpapered our hallway nook and LOOOOOOVE it. It's such a great pop! I ordered from Bellacor.com and they have some pretty decent prices. Love your pattern, it's perfect for that area. Oh, and from what I've heard new wallpaper is MUCH easier to get off than old wallpaper used to be. It is also WAY easier to get off painted walls. It's the most difficult to get off walls that were never primed or painted and were wallpapered directly to the drywall. So you should be fairly safe :)
ReplyDeleteJust to be sure...is this a black or blue color? I love love love it. I was hoping it's black cuz that is how it looks, but I think you were mentioning your wall paint is blue...which means this is probably blue as well. Would love to know, maybe I can find it in black somwehre.
ReplyDeleteLove this wallpaper Sarah, it looks gorgeous in this hallway! I've been looking for something for my upcoming bathroom makeover, and this is definitely a contender! Thanks for sharing the link!
ReplyDeleteThis is encouraging because as a wallpapering virgin, I am nervous about papering one wall of a bath, At least I don't have to worry about running out of paper. Happy that wallpaper is making a comeback. Not happy about the prices!
ReplyDeleteLove love love! I’ve been toying with the idea of papering my laundry room and now I’m inspired.
ReplyDeleteNot sure what you had in mind for the light fixture, but I love what you have currently. It’s reading greenish on my screen and I love the contrast and unexpected nature. I’d think twice before covering that beautiful paper with frames (and a bunch of holes). Nice job Sarah!
It looks amazing, Sarah! I hung wallpaper in my rental kitchen when my girls were babies....it was popular back then! When I moved into another home, I had to remove wallpaper which was a complete nightmare and turned me off ever hanging wallpaper ever again!!
ReplyDeleteAgreed. I love the look, but having removed it from two bathrooms in my first home, I will never install it.
DeleteIt sure looks great! I can imagine you are looking in there many times a day! I would be. Lovely.
ReplyDeleteI have loved this wallpaper for a long time. Every time I see it used, I light up like a Christmas tree. It's beautiful and expensive paper. I will be buying a new house and want to use it in a bathroom. How many rolls for your space did you wind up using? I am wondering if I should buy it in advance and save it. So afraid it will be discontinued before I can get it. You did an amazing job! It's beautiful. I love the new house as much as your previous one. Both homes are stunning.
ReplyDeleteExpecting the “Indigo” color to be navy, but when I see it online it looks charcoal. What color is it actually?
ReplyDeleteIt's right in between -- it matches the wall color almost perfectly. I'd say it leans more navy.
DeleteSarah, Your home is absolutely beautiful, I love your style :) I just discovered your blog bc I bought this wallpaper and was hunting for some tips on how to best apply it. I see you used the premixed paste which is so much easier so I feel better about doing that. My question is really - where did you order the green light fixture in that space? The circular one hanging where you papered with the pergola? Thank you in advance!!
ReplyDeleteThank you Jamie! It's a shade from Ikea. :) You can see how I did it here...https://www.thriftydecorchick.com/2018/02/using-lamp-shade-as-light-fixture.html
DeleteDid you skim your walls first?
ReplyDeleteNope!
Delete