DIY Craftsman Chunky Trim For Large Doorway
January 30, 2019
Share this
How to add thick Craftsman/farmhouse trim to the top of a door.
A good friend of mine is building an AMAZING house. (I hope to show some of it to you soon.) :) I love meeting her out there to see the progress, and the other day I noticed their pretty Craftsman door trim. It hit me how much I missed it in this house.
You may remember my journey in our old house to rid the house of the tiny skinny trim, slow but sure...it took years but I got all of the windows (they had no trim at all) and the doors done. It made a BIG difference in that house. HUGE!
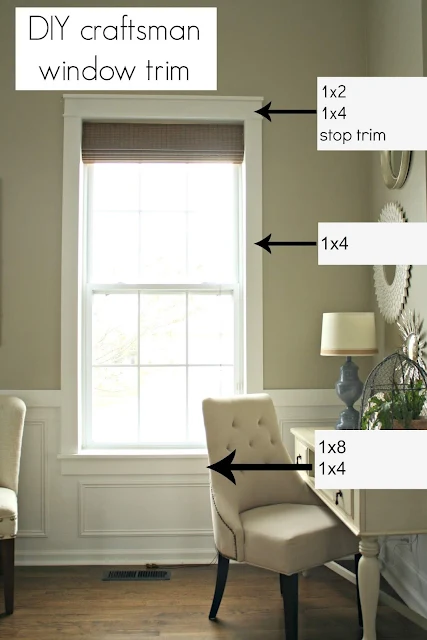
Here's the how-to for the Craftsman window trim:
And here's the tutorial for the Craftsman door trim:
I almost had the builder price out similar trim for this house, but we were at the point where I was getting the shakes every time we added something...I just couldn't change anything else. Also, I wanted to make sure I actually wanted it in this house. Unlike our first house, all of the windows are trimmed out. The doors have decent trim and the pass through areas aren't drywall, but wood all the way around. So those were upgrades.
But the exterior of our home is a modern Craftsman look, and it's just a classic design. I knew it would look great in this house after I saw it at my friend's new place. I gathered some supplies for this project ahead of time, knowing that I wouldn't want to leave the house for a couple days.
This is the area I wanted to tackle first -- it's the opening we look at most often:
This time I went with mdf for the side pieces, instead of wood. If you have high traffic doorway, or young kiddos who may be running things into the trim, I'd stick with wood. We don't need to worry about that anymore, so the mdf holds up fine.
It was the same price as the select pine and it saved me a couple coats of paint and sanding on the corners (I always do that because the corners on the 1x4s are SO sharp):
Because they were the same price, I also got the 1x2 in the mdf as well.
For this project I used:
- two 1x4s in mdf
- one 1x2 in mdf
- one lattice piece in pine
- one 1x8 in select pine -- no knots to worry about
Refer to the links above for step-by-step instructions for the Craftsman trim! I give detailed instructions in each one. :)
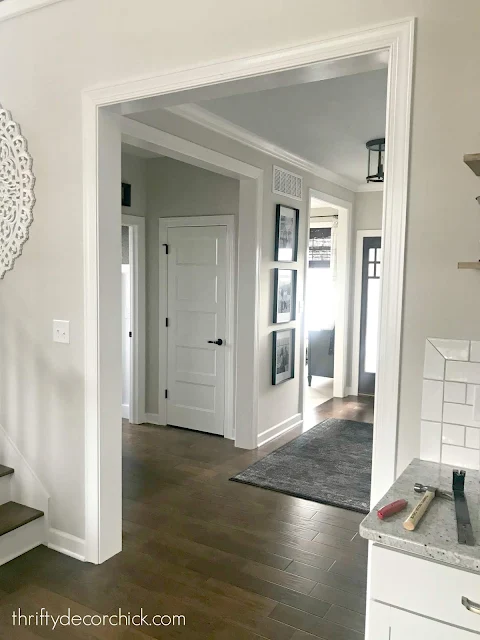
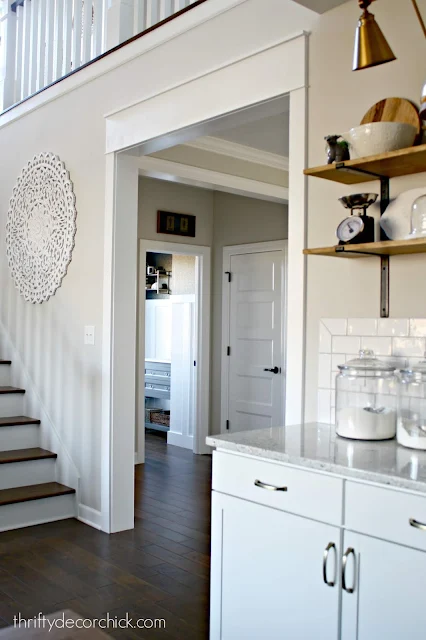
I went with the taller, eight inch board for the header because this room is so grand. It can definitely handle the taller trim. I'm SO glad I did. It looks GREAT!!:
The paint was still wet when I took these, so it may look a little splotchy.
What a difference! Like it always should have looked this way! I'm so, so happy I decided to tackle this project:
The thicker trim gives a room instant charm and character. The front door is next -- I think it will make that much grander as well. Check out the recent foyer redo here!
I've decided I'm going to focus on the larger, taller doorways first. I don't know for sure that I'll do all of the regular doors. Time will tell. For now, adding the trim to these areas will make a big difference!
Here's a reminder of the before with regular trim:
And here it is beefed up! So glad I decided to tackle this project again!:
You know it was a good decision when it looks like it always should have been that way! If you have any questions that aren't covered in the tutorials, be sure to let me know.
Now I can't wait to get started on the front door. :) I hope to get it done this week. Stay warm friends!
See more of our home here. To shop items in our home, click here! Never miss a post by signing up to get posts via email.


How did you cut the mitred corners at the top without damaging the sides?
ReplyDeleteThey are all straight pieces -- no mitered cuts! :)
DeleteI think Joss means how did you get rid of the mitered corner(s) on the left and right side trim when you removed the original thin piece of trim across the very top. There would have been half of the mitered corners there to deal with.
DeleteOhhh got it! All of the trim was replaced.
DeleteIt’s is soooo beautiful! What room is right off the foyer?
ReplyDeleteGorgeous, Sarah, what a difference it makes!!
ReplyDeleteThanks Pat M. for clarifying my question :)
ReplyDeleteStill would like to know how you did that ��
It’s all new trim pieces the whole way around, no? So there isn’t a concern about damaging the old pieces. (I think!) Chrissy
DeleteLooks great. We have a large opening that doesn't have any trim. I've been thinking we should add some.
ReplyDeleteOH I love that so much!!! I want to do that in my home.
ReplyDeleteI remember when you did this in previous house, it's great looking. We recently moved to a 14 yr old builder basic house with tiny trim. I painted it immediately (because it was apricot color!), but plan on replacing it and staining it a light/natural color. Eventually, I'd like to switch out the doors too and have those stained to match. For the "during" phase, do you think it would be weird to have the window and door trim natural, and the baseboards and doors painted? Farther down the project list is new flooring (get rid of cheap laminate for engineered hardwoods), so obviously I don't want to replace baseboards until then. Thoughts or advice? Note, our house is a mountain farm house.
ReplyDeleteNo I think that would be fine! As long as each trim (base and base, etc.) matched the others, it would be fine in the meantime. :)
DeleteHow much of a reveal is on the left and right side with the lattice piece and the 1x2? 1/4” for both? Looks very minimal. Love it!
ReplyDeleteThank you! Yes, I make that piece 1/2 longer, so 1/4 inch on both sides.
Delete