Stained Wood and Painted Stair Makeover
July 19, 2017
Share this
Hello hello! I'm super excited to share this project with you -- it turned out so beautifully! It's not a huge difference comparing the before and after in most pics, but in real life it is huge. I've been wanting to tackled this for years and finally got it done.
I love bringing you projects that I complete with the help of Minwax -- my favorite stain! And this is one of my all time favorite projects ever in our house, it's just upped a bit with this DIY.
I shared how I took the carpet of our stairs seven years ago. I had a dream of making it look custom -- and I did it with only $50 worth of supplies because we had a great start with the wood steps:
You can see this was before our fridge leaked everywhere and ruined the laminate floors in the neighboring room -- soon after we replaced the main floor with wood floors.
When I finished these steps the first time I choose a stain with red tones -- I believe it was Red Oak by Minwax. It doesn't look too red in that photo above, but when you compare it against the wood floors you can see the difference.
I thought for sure I took before pics but can't find them, but you can see peeks of the red tone here:
This post may contain affiliate links for your convenience.
See my policies and disclosure page for more information.
They were a completely different look than the wood floors:
So for years I had wanted to redo them -- but didn't make it a priority until recently. If you look close on that photo above, you can see where the cats tear around that corner and their scratches were starting to look bad. And overall the steps were just looking a little worn after so much use.
So months ago I had the stairs sanded down so I could tackle the restaining -- but then I got caught up in other projects so they sat bare for months!:
I added the tape recently so at least that wasn't there all this time. 😂 I had to clean the bare wood first because they had gotten dirty over the weeks months that I put off the project.
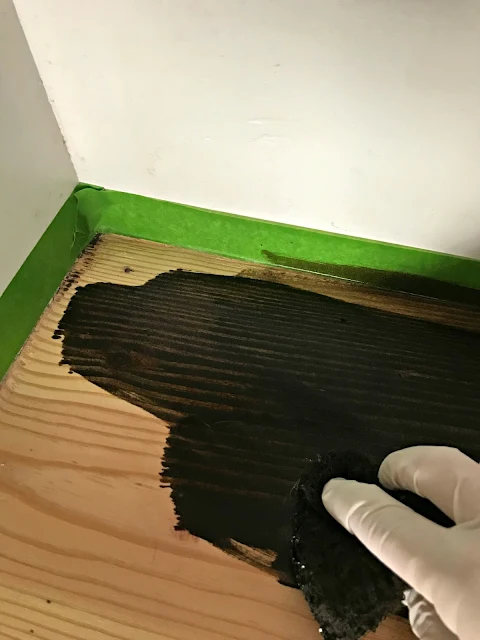
Then I started the process by staining the steps with the new color -- Jacobean! It's the color we used on the floors but I knew it would go on darker on the stairs. They are pine and the floors are white oak, so they are not a perfect match.
The steps are darker than the floors but I quite like it -- if they don't match exactly I'd rather they be darker. Just not red. ;)
Be aware of how different a stain will look on various types of wood! It's amazing how they different they can look.
I always stain the steps first because it's easier to paint over random stain mishaps, but it's a lot more difficult to stain over paint drops. :)
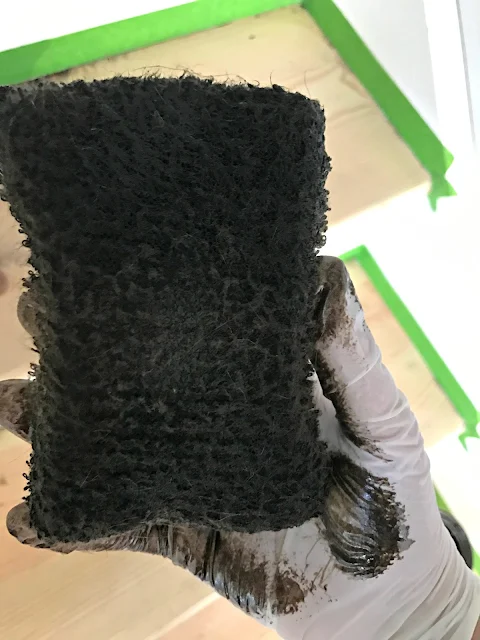
I used these staining pads for the first time and I'm absolutely obsessed with them!:
They make the job go so much faster and aren't as messy as a rag. I adore them and will be using them all the time from now on -- especially on bigger jobs like this.
Now when you stain or polyurethane floors, you have to keep in mind that you can't use them for some time. At least a few hours and that's pushing it with the poly. Last time I did every other step so we could still maneuver up and down the steps. This time I timed it when we were heading out the for the day so we didn't have to worry about it:
Stain dries pretty quick compared to the poly (make sure you wipe down each step after applying the stain!). Too much stain will gum up and take a looong time to dry.
After letting it sit for a couple days to ensure it was completely dry, I moved on to the poly. You can use a foam brush or regular brush. I prefer the foam because I can just toss them after:
But I ran out of them for my second coat so I used a brush that time. ;)
You want to make sure you brush on a nice, even coat of poly each time. Watch for bubbles -- knock as many of those down as you can. Stairs are nice because you don't have to be super picky about the finish -- I'd rather it not be SUPER smooth for safety reasons.
By the way, I get asked a lot if the stairs are slippery. We slid down the carpeted stairs WAY more than we ever have on these. Knock on wood -- it's happened maybe twice maybe?
You cans see how the poly really brings out the wood tone even more:
So pretty! I used this fast-drying polyurethane from Minwax (in semi-gloss) in the can:
By the way -- I didn't even realize they sell poly in a spray can! Mind blown. Keeping that one tucked away for the future.
The wood will not be quite as shiny when it dries unless you use a high gloss:
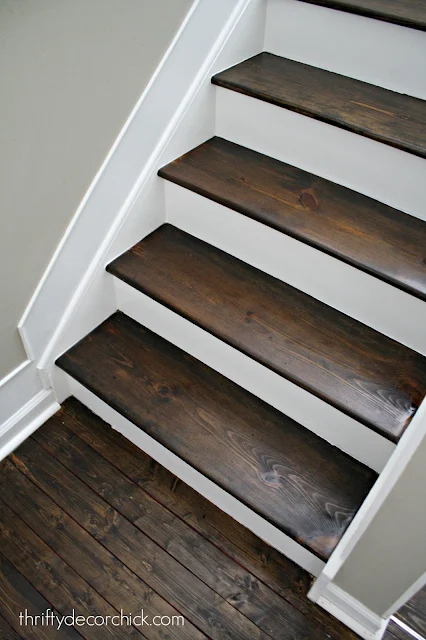
White and wood -- one of my all time favorite combos! So classic.
See how our pine treads had that rounded edge to start? We lucked out with those -- I remembered that from when we built the house and that's why I tackled this project years back. I know MANY of you have tried this on your stairs over the years and some have had the same, some uncover plywood. It's a toss up!
Here's the landing going to the upstairs:
I get asked about what we used on the landing a lot -- and it was just the basic pine wood (that I've used as shiplap many times over the years). I think each package is around $10 and I think I used two? Three? I wasn't sure if it would hold up but it has -- and it sanded down just fine too!
Our flooring guy offered to replace this with our hardwoods but they've held up so great, I didn't see the need:
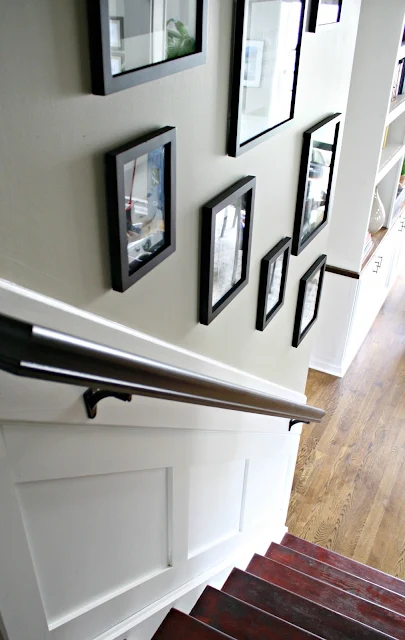
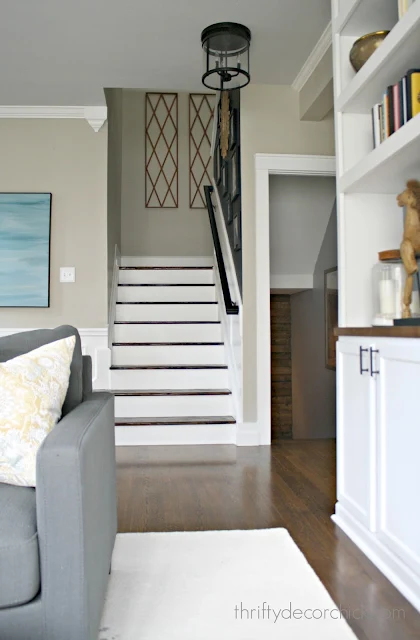
I've simplified this view over the years. The art pieces are window grids I found at Goodwill years back. I love them:
The stairs don't look that different from this angle, but when you're on them the difference is huge! No more red!:
These pretty stairs have gone through many updates over the years -- NOW I can safely say tearing that carpet off seven years ago was a GREAT idea! ;)
Wood treads and white risers are my jam. Love it. This was another project I had all the supplies for, so I didn't have to pay for anything during this no spend month!
I will be away at the Haven Conference this week so I'll be back next week! I hope to see some of you there! Have a great weekend my friends!
This post was sponsored by Minwax, but all opinions and experiences are my own.
I only share brands I use and trust with my readers.
Never miss a post by signing up to get posts via email.








Beautiful, Sarah! Did I miss the info for the stain pads?
ReplyDeleteHave fun at Haven. I'm hoping to make it next year! It's my goal!
So sorry I forgot to link to those, they are great! I added the link above the photo.
DeleteIt is a definite improvement. In my old house the stairs were carpeted and I hated it but was afraid to attempt anything else.
ReplyDeleteI need to do my stairs too. So you hired someone to sand them, is that right? Sanding is probably the part I'm dreading the most so perhaps this is doable afterall! Hadn't thought of just hiring out that part.
ReplyDeleteI did, only because he has a sander with a vacuum attachment and it is SO nice not to have a huge mess afterwards. I highly recommend it!
DeleteThat looks SO AMAZING! Good job!
ReplyDeleteXO Ellen from Ask Away
www.askawayblog.com
Great job! Looks great!
ReplyDeleteThey look beautiful. I took this task on this past Winter. It was hard work and wow what a mess. I tried to match our floors but in the end it didn't work out that way. They look so much better than the worn carpet though. I had to do so much caulking as well where there were gaps on the sides and where my new risers met the steps. I didn't notice that you did that. Did you not need to?
ReplyDeleteWe haven't needed to and that's been nice!
DeleteI would love to get rid of every bit of carpet in my house! But the last time we had it cleaned the carpet man told me that carpet actually functions as a sort of filet in your home. Nevertheless, when we build our next home, carpet will not be installed! neither will stairs, but yours are very pretty!
ReplyDeleteLooks fabulous, Sarah! When I had my lower level floors changed out recently I actually had them leave the carpet on the stairs so my old pup doesn't fall down the steps. She slides around so much on the hard floors as it is, poor thing! But I'm jealous for sure of your amazing stairs!
ReplyDeleteYes, that is the only thing I should have mentioned! Our dog does not like the wood stairs!
DeleteCan you give me info on the stainpaids?
ReplyDeleteAlso, I have the nice stair tread too but mine have 3 screws on each of them. Any idea how to fix that? Is there a putty or filler that’s stainable you’ve used?
So sorry, meant to link to that! I added it right above the staining pad photo. They are AWESOME.
DeleteWe have a screw too, but I just stained over it. I still haven't found a stainable putty I like. :( If they aren't huge you could just leave them -- I find that's less noticeable than the putty most times.
They look beautiful!
ReplyDelete