How to make store bought drapes look custom
April 10, 2017
Share this
Hey all! Hope your weekend was wonderful! We're back to regular life after a fun and relaxing spring break. Counting down the days till summer!
As many of you know we knocked down a wall a few years ago and expanded our family room -- one of the best things we've ever done in this house! I didn't buy much new for the room at the time because our budget went to the construction aspects of the reno.
So three years later I've started making some minor changes -- nothing major, just updates that are really pulling the room together. I'm so happy with how it's all coming along! You can see the new chairs we added last month here.
When we redid this space I kept the old drapes I had made for my old office in there, but over time I've wanted to hang the drapes higher. I've also wanted to find a simpler fabric for this room so it wouldn't compete with the rugs and pillows.
So like always, I kept an eye out. Forever! I shopped my favorite fabric stores and checked online. I also looked at places like HomeGoods to see if I loved anything. I kept running into the same issues -- even though I love making my own drapes, I didn't want to spend much on these. If you can find a fabric you love and use a coupon, you'll get a good deal. I just couldn't find fabric that I had in mind for the room and still didn't want to spend quite that much. (I needed 12 yards total.)
I wanted to hang them higher too -- I like hanging drapes just a bit higher than the windows, and when I originally hung my old drapes I didn't have trim on the windows, so they hung at a decent height. Now they looked a little off hanging just at the window trim.
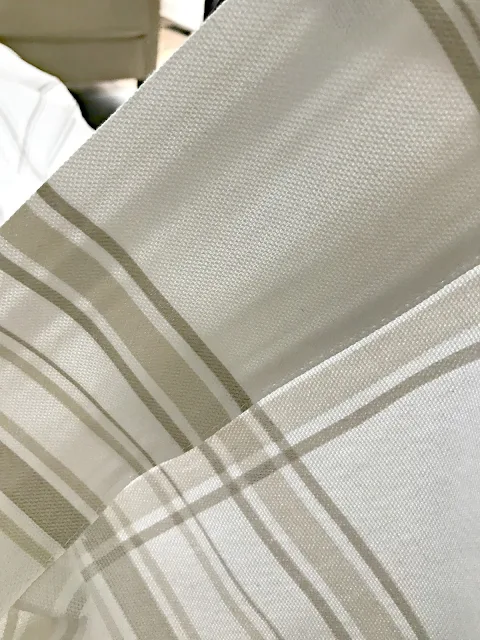
Problem is, finding drapes at 103-108 inches (for nine foot ceilings) are NOT cheap. Even at places like Target you're looking at around $50 a pair. So I decided to look more into the HomeGoods options and make them work for me. I took home at least five sets of drapes over the past few months to try them out and finally found some that I absolutely LOVED:
I found a 84 inch version in blue (affiliate) here as well.
They came in 96 inch length which was too short -- but there's an easy trick to fix that! You need to make sure the drapes have large hems at the bottom and top:
Mine had about 4 inch hems at both ends -- perfect! You'll want to inspect your drapes first to make sure they have a large hem like this. Most of the sets I looked at there had this size or even larger.
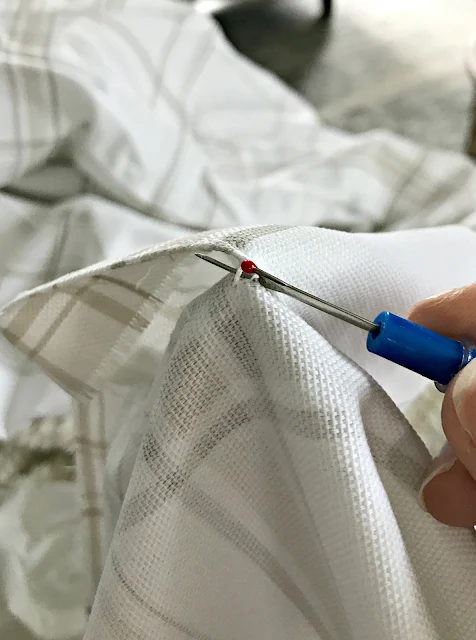
It's so easy make these longer! Just grab a seam ripper and start tearing out the seams -- this takes some time, so turn on a good Lifetime movie like me and just sit mindlessly doing it. :)
To get the length I wanted I took the top and bottom hems out. By the way, these drapes were the kind that you put the drapery rod through at the top -- they didn't have any tabs so it was super easy.
I moved my hardware up a few inches, ironed the drapes and then hung them. Once they were up I could figure out how long I wanted the length. If I wanted them to puddle I could have just left them as they were, but I like them to hit right at the floor.
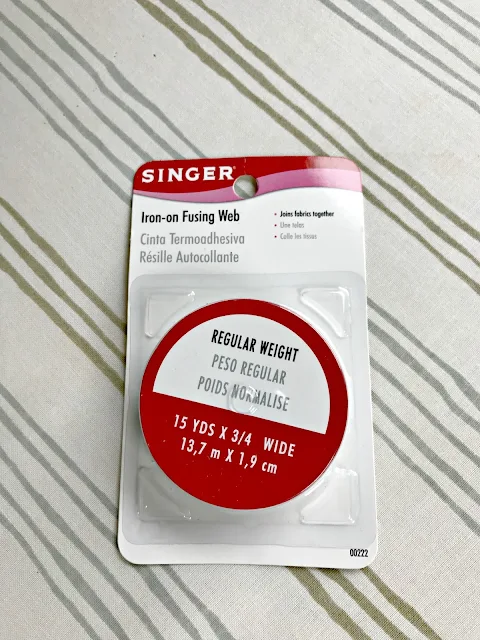
So I grabbed my trusty hemming tape and the ironing board and figured out how far up I wanted to hem them:
I've used this stuff forever -- it's also called fusing web or stitch witchery. it's SO easy to use and you don't have to do any sewing. So if a sewing machine intimidates you, you can make your own drapes with this! Just place it on your fabric where you want your hem and then iron (be sure to use your steam setting to make sure it sticks well). Before I learned how to sew I used this stuff all the time to make drapes -- it holds up for years and years!
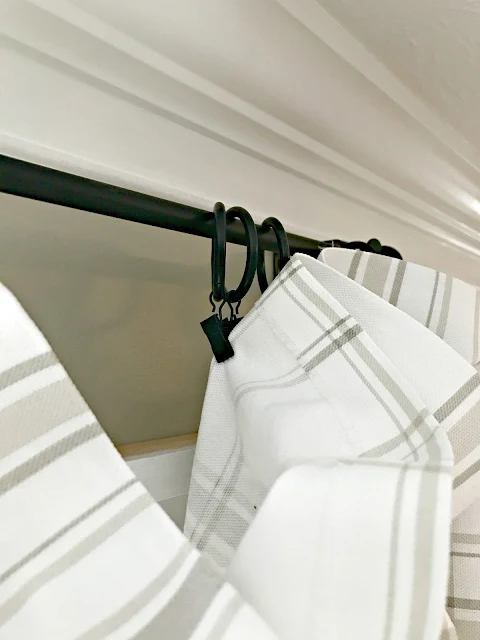
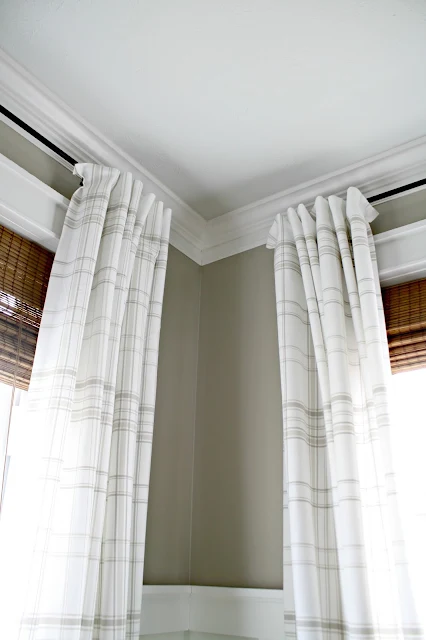
Custom drapes are made with pleats at the top that make them look much more expensive. Instead of doing that, I just use my hook trick and grab the fabric from behind:
It makes them look like someone sewed them for you. ;) I've done this for as long as I can remember on all of our windows and it always looks good. The thicker the fabric the better for this trick:
The new drapes are so fresh and they just feel so right as the temps are getting warmer. I absolutely love the plaid design -- it's a classic:
And they work so well with the rug and pillows -- they're not going to fight with other fabrics. I thought I wanted something with dark blue in it, but when I found a set I loved and hung them up they were way too much for this room.
I love the simpler design and colors in these:
I think they go with the classic look of our house so well.
And I love the new height! It just looks so much better and more pleasing to the eye:
I know many designers recommend going super high with your drapery rods but I don't necessarily agree with that. I've seen some that hang a few feet higher than the windows and that just accentuates the window size and makes them feel smaller to me. You want them to appear taller, so going just a bit higher works well.
The best part? All four drapery panels were $50 total! I didn't have to spend any more money on these to make them work. (I had the hemming tape but it's super cheap anyway.)
Here's how that corner looked just after we finished up the room years ago:
They weren't standing out enough for me -- I wanted to brighten them up!
Here are the new drapes hung a few inches higher:
I adore the old drapes and am trying to figure out if I want to use them elsewhere, maybe upstairs where they would be a good height for the shorter ceilings. I was just ready for a change in here and LOVE how these look. I'm glad I held out till I found exactly what I wanted.
Have you tried any of these drapery tricks? You can also add length to drapes by adding inches of fabric at the bottom or top -- I was going to do that next if this didn't have enough extra fabric to work with.
Here are a few more drapery projects and tricks I've shared over the years that you might find helpful!
More detail on how to get the pleated look on your window treatments and some other simple ideas:
How to hang bamboo roman shades:
How to make no-sew fabric roman shades (from way back but such a great project!):
Adding some color to drapes by adding a leading edge:




Perfect timing for this post. I was just noticing on Pinterest that the more custom, pleated traditional style curtains are making a huge comeback. I was pricing them out for hundreds of dollars -per panel! I love the seam ripper and pleat trick. Thanks!
ReplyDeleteThey look great, I love the new curtains!! Great tips too. I have done the seam ripper trick with the stitch witchery, so worth it to save big money on long drapes! :)
ReplyDeleteOooo I wonder if my Home Goods has these right now too if you just found them!
ReplyDeleteThey turned out great. And hanging drapes higher is always a good idea.
ReplyDeleteI've tried lengthening drapes in the past by removing the hems. But no matter how much I iron them, I can't get rid of the crease from the original hem. Do you have a trick? I've tried with & without steam. And you can still see the crease.
Your curtain solution is inspiring and one that virtually anyone can adapt. I had to be creative with our living room curtains as well, which face our neighbor's bedroom window, plus their side gate (which they use very frequently). It's a bummer because we need as much light as possible from these windows, so I found I could not use a conventional curtain approach. I ended up using a couple of H&M table runners per window, but hanging them about a quarter of the way from the top so that we could have both some privacy and light. As a bonus, I enjoy the design statement they make. Here's a photo of the treatment, from my "French Industrial Lodge" pinboard @ https://www.pinterest.com/pin/174866398012763023/
ReplyDeleteThe new curtains look great! I like them so much!
ReplyDeleteOne tip, though, as it looks like you are using the seam ripper the same way I used to, which is actually incorrect. :) Here's a video to explain the intended use: https://www.pinterest.com/pin/162692605264377226/
Yes! I've tried it both ways but I just find it easier to use the pointy side most of the time. ;) (Especially if it's a really tight spot.)
DeleteThis is awesome! Never even occurred to me to do this with the hems! And the new curtains look so so good! So did you end up hemming both the top and bottom?
ReplyDeleteI didn't even hem the top -- it had a folded part and with the crease it was staying put. ;)
DeleteThose drapes look amazing and they compliment the wall colours beautifully!
ReplyDeleteOh I love this, it just brightens up the space and just that little bit of height changes everything.
ReplyDeleteGorgeous!
Lauren | Lovely Decor
xx
I have a tip for you! Get the longer curtain rod (the one that says 66'-120') and use them on a smaller window. The longer rods come with THREE poles, while the shorter rods that you currently have come with TWO poles. If you don't use the third/extension pole that comes with it and you only use two of the three pols, then the curtain rod is the size of your standard windows. That way you don't get that awkward spot where the two poles meet and one pole is skinnier than the other. Not sure if this made any sense but it has worked well for me! Makes the rods look custom and much nicer.
ReplyDeleteI was noticing how nice your new drapes look! The florals are lovely too but these present a fresher, modern look.
ReplyDeleteGreat explanation of the "Fix" for easily available 96" panels when you need minimum 99" (from bottom of clip rings) for a 9' ceiling. I've done two drape hacks lately for mine & my daughters. For mine, I'd found dirt cheap linen panels in 108" length, I wanted to make them washable so was afraid to hem them up to fit. Instead...(scary) I washed a panel then partially dried it then hung it. The panel shrunk almost 9"! But it tightened the fibers and by carefully timing how long in the dryer so they didn't shrink too short, I got them to shrink to 100" which works for hanging from clip rings. Then I had to wash, partly dry and hang 7 more panels.
The 96" beautiful Pier One lined drapes my daughter found at clearance prices were lots more work. She bought two extra panels which I measured, carefully pattern-matched, cut the extra needed drape from the extra panels. and sewed onto the bottoms of the drape panels. Lots of work since she needed 8 panels. But the look is madly custom.
Red