How to print large engineer photos for art
April 03, 2018
Share this
I asked if you wanted to hear more about these inexpensive prints on the stained shiplap wall and many of you said YES, so here we go! I've seen this done for a year or so now, but haven't had a reason to use it just yet.
This is an incredibly inexpensive way to get large photos printed, but there are a few things to consider:
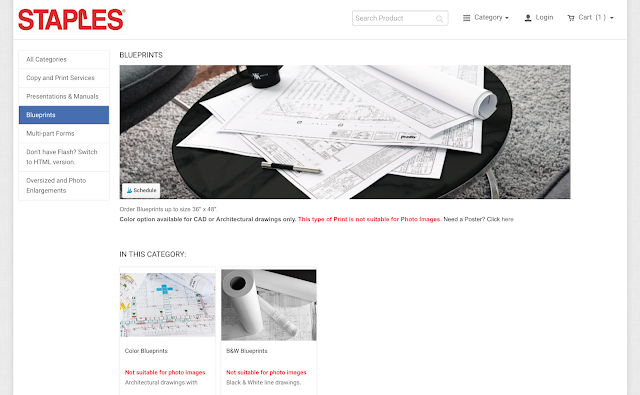
First up, they used to be called engineer prints, and I couldn't find that on the Staples site anywhere. I finally came across them but they are called blueprints now -- so keep that in mind.
It seems some Staples no longer offer this service. Call your local store to check pricing!
Here's a link to the page where you need to start:
Go down the page and you'll see the sizes and prices for each. I did the two by three foot size but they offer a smaller and larger option as well. I'm trying to think where I could put the three by four!:
Pick the size you want and click "design now."
When you get to this page, click black and white:
The color is more expensive (but still a great price), but I hear it can't be a full color photo. It needs to have plenty of white space to work -- but correct me if any of you have used it and been successful!
By the way, as you see, it says not suitable for photos, but they turn out just fine.
Click "add files" on the next page and download your photos. You can download a bunch at once. I just showed one for this tutorial:
After you upload, check on a few things:
- Name your job
- Click the Media/blueprints option and make sure the right size is selected
- Choose your orientation -- it loads them at landscape so I changed it to portrait
When you're ready to go, click "add to cart" and checkout:
You pick your store location and the order goes directly to them. Mine were printed and ready in a couple hours! And I got three huge black and white prints for less than $11!
It really is a fantastic service. I have heard rumblings that they may discontinue printing photos, but my store approved it no problem.
These are printed on thin paper -- about the weight of printer paper, probably less. So be gentle with them because they'll fold up easily while you work with them.
I was surprised by the quality! They turned out even better than I thought they would:
Have any of you tried this easy trick? Let me know if you've tried the color option! This is such a great, simple service and I was incredibly pleased with the whole process.


How awesome is that, I love these!!! Great tip, Sarah!
ReplyDeleteWhere did you find the frames for these? Love the finished product!
ReplyDeleteIKEA!
DeleteI did this of my granddaughter...sorta like an Andy Warhol....I love the way it came out...I did mine at FedEx/Kinkos....they were SO nice to work with...Then I had them framed at Michael’s with my 50% coupon...that was her last years birthday present...but I really love the way you framed and hung yours Sarah❤️���� for some reason I can’t post you a picture of what mine looks like 🤦♀️...ugh!
ReplyDeleteLove that idea!
DeleteWhere did you get the large hanging clips? I would love to use them on a project for Anna's room!
ReplyDeleteWhere did you get the large hanging clips? I would love to use them on a project for Anna's room!
ReplyDeleteCrate and Barrel! I link to them in the last post. :)
DeleteMost cities have local print shops (sometimes firms that specialize in engineering work!) that do this also! I've done this for big posters for grade school games as well (pin-the-tail or heart or whatever, etc!) - such a money saver!! did you use the inexpensive poster frames or make your own??
ReplyDeleteFrames were from IKEA!
DeleteI live this,and have been wanting to try for a few years Yours look great!
ReplyDeleteI've done the color option a few times. Usually you get flat paper that has good color and good clarity (if your original picture has clarity). However,the last time I had a color blueprint made it was on a bright white glossy paper - which was amazing! It looked as if I bought the poster from a store. I can't help but think the Staples clerk was feeling generous with me that day and gave me a higher quality print, It sure looked nice! Flat or glossy - for the price - AMAZING quality! Because of the price point, I have made seasonal poster prints for large scale art that I just throw away after the season - knowing I can find something brand new and interesting for less than $10 next season! Oh - and another thing I really like, since the price point is so affordable, I wasn't concerned about a little trial and error. I really like that aspect as it makes decision making - and risk taking - a little easier!
ReplyDeleteGood to know!! I’m going to have to try it.
DeleteGreat idea for prints. Thanks for sharing.
ReplyDeleteYou made have gotten an "upgrade" like we did when they were out of their standard paper. Next time I do this I'm going to ask if we can pay for the more expensive paper. Totally worth it.
ReplyDeleteI did this 2 years ago for my daughter's graduation party. Took 3 of the more casual photos and printed 2x3 then used very cheap poster frames from Walmart, since it was just for the party. They turned out so nice that I've kept them in her room!
ReplyDelete