Mudroom Command Center
January 15, 2016
Share this
Whoot!! It's Friday and I've knocked another project off my list! I'm not spending money on decor or DIY materials this month and I'm determined to get through a long to do list. Some items have been on the list for years…this was one of them.
I think it was on my first IKEA trip that I picked up these Dignitet sets -- they're supposed to be used to hang curtains but I had seen them used to hang art instead and I loved that idea. So yeah…I've probably had these for about five years now. Maybe more. I'm telling you, I am ON it.
Hold the wire up and cut just past the where the second screw will tighten into the wire (where I have my nail):
And I've added some art over the past year or so, but I'm not sure it will stay or stay in this spot:
I think it was on my first IKEA trip that I picked up these Dignitet sets -- they're supposed to be used to hang curtains but I had seen them used to hang art instead and I loved that idea. So yeah…I've probably had these for about five years now. Maybe more. I'm telling you, I am ON it.
I am one of those weird ones that doesn't really mind putting IKEA stuff together, but the instructions for this stumped me a little bit. Afterwards I felt pretty dumb that I couldn't figure it out, but sometimes words are really helpful. :)
Since I figured it out I thought I would share how to install these -- they are so fun! Such a simple, cute way to hang art, photos and papers. I've been planning to hang these in the mud room for years now (when I got them I didn't have a place in mind, I just thought they were cute). It's a great idea for a "command center" so I knew it would work well in there.
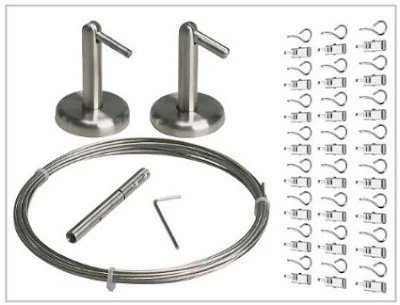
The assembly is easy -- screw the pieces marked with "L" together and "R" together. These hold the wires:
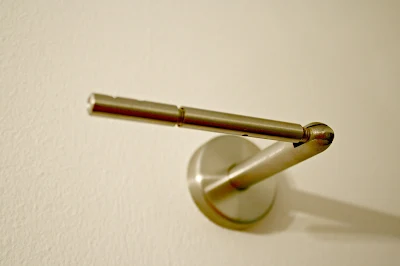
Mark where you want them on the wall, making sure the little part that turns is facing the direction you want and is level:
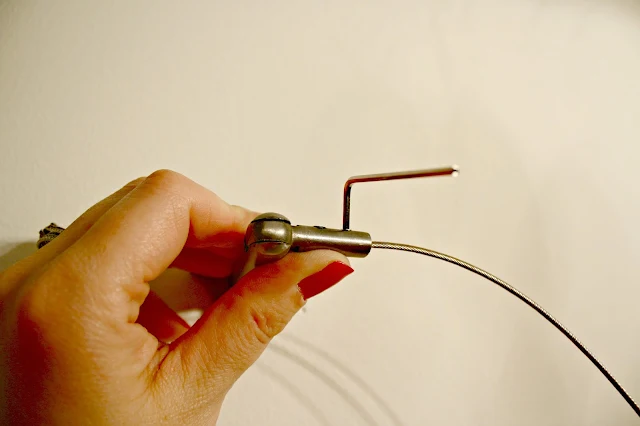
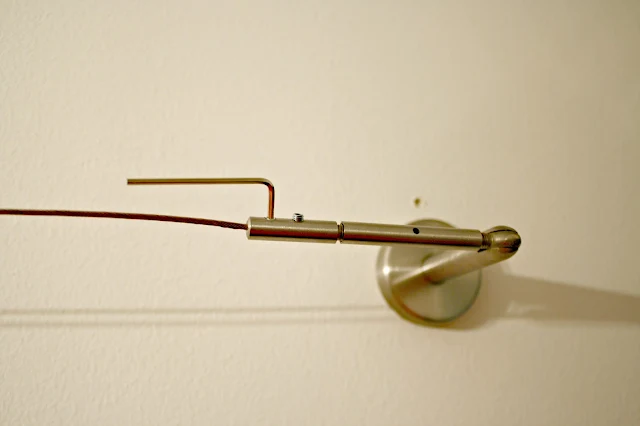
The set comes with a little Allen wrench that you use to loosen the two small screws. Then place the wire in and tighten them again -- this holds it tight:
Next, measure where your right bracket will go (make sure it's the same height as the one on the left) and then install it. This side has an extra piece you screw on:
This part is important -- loosen those two bars a bit. You'll want to be able to tighten them after you insert the wire.
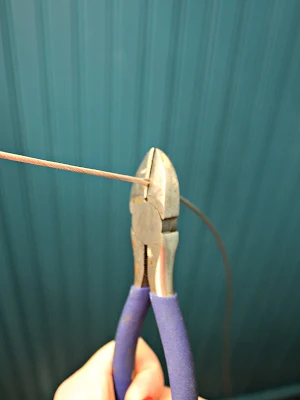
Use wire cutters to snip it down -- you may have to rock it back and forth a bit to get through all of it:
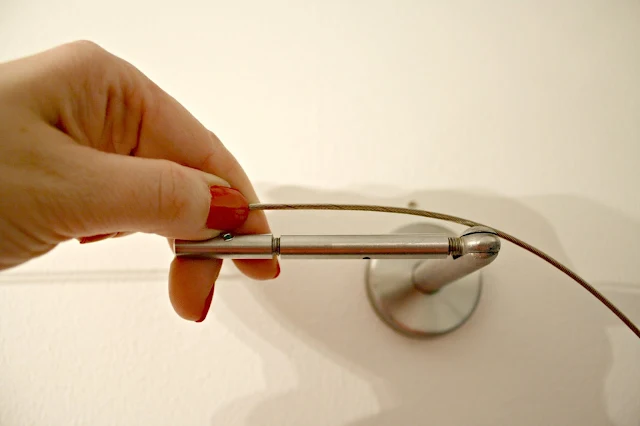
Then insert the wire and hold as tight as you can while you tighten the screws:
This is why it's important to unscrew this side a little bit before you insert the wire. Because you did that you can turn both pieces and they will put the wire taught:
The upper photo is the wire installed without tightening, the bottom is how nice it looks when you screw those pieces together after inserting the wire:
As you can imagine, it's kind of hard to gather the need to do this from just photos and no words in the instructions. :) Sorry for the lighting -- this is the hardest room in the house to photograph!
Years ago I found a vintage sign I picked up for this room:
I've since moved it because it just didn't hold enough. I like being able to put important notes, school papers and of course the Bub's artwork on this wall and there weren't enough clips.
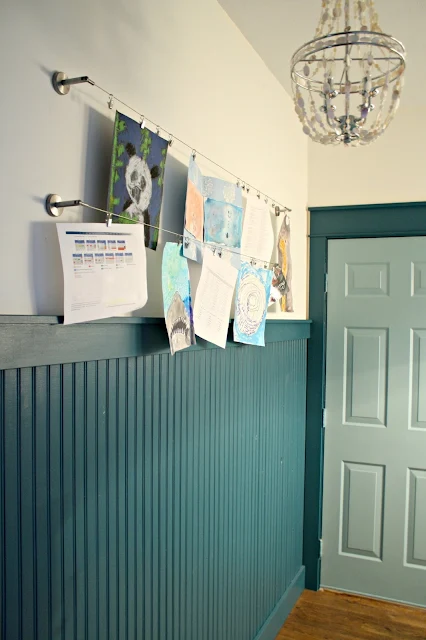
This IKEA doodad works perfectly and I love the look!:
I flip flopped my usual trend in here and went with white walls and color on the wall treatment. Because of that I've been planning to use art to pull in some color on the walls. This works great!
I still have to build the storage unit up above the bench, but I have added a few more little details and took one away -- our old cat that passed away a couple of months ago LOVED the no-sew cushion I made for this bench. He loved it so much that he slept on it all day and night (this is the warmest room in our house because of the furnace). It was dirty from months of this and because I covered it with a woven rug, it wouldn't come clean. So I removed it and actually like it better without for now:
I don't know that I'll put one back on there or not -- I love seeing the wood bench so much!
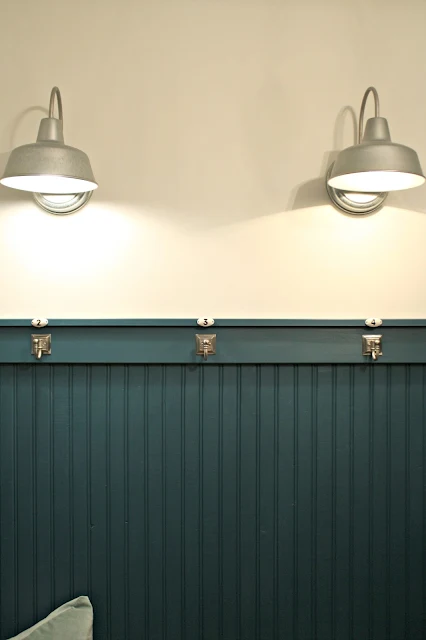
I couldn't pass up these little ceramic numbers:
And I've added some art over the past year or so, but I'm not sure it will stay or stay in this spot:
I have a feeling I'll change that up to something simpler because of the art along the long wall now. I plan to add crown molding to the room as well.
This is another room that I really want to finish up this year -- there's not a ton left to do but I have a crazy idea that I plan to look into a little further. Of course I'll let you know if I tackle it. ;)
Otherwise the only big project is the built in above the bench -- I finally have a plan in mind. I love to look back at pictures to see how far this room has come!:
That's how this room looked ALL the time. Moving our laundry to the basement was one of our best decisions ever in this house!
Have you used this cute little IKEA contraption? I love the idea of using these wire hangers for art! I think it would be so fun in a playroom or kid's room too. If you don't have an IKEA nearby you can get it on Amazon too. Those sets come with the clips as well, which you have to buy separately if you purchase at IKEA.
Also, I used two Dignitets but there's a TON of wire in each one. I only used two thirds of one set of wire -- so I have plenty left to do this in another spot with more brackets. Of course you can use these for their intended purpose too -- to hang lightweight drapes. They are great for odd spaces like a bay window or around corners because you can add support pieces along the way.
Have a great weekend my friends!
Here are some projects from this room you may enjoy:
DIY built in bench (using kitchen cabinets)
Why we moved our laundry to the basement (if the photo above doesn't clue you in)








I just got a couple sets of these for Christmas! I've wanted to try them out in my classroom. I'm in the basement of a hundred year old building with cinder block walls and the only way to hang curtians would to mount something above the windows into the dropped ceiling. Other things are screwed into that dropped ceiling so I have visions of it working. This advice helps! Thanks!
ReplyDeleteYou can actually hot glue onto the cinder block wall. When it is time to remove the items at the end of the school year - the glue will peel right off. We've done this for years at my kids' school.
DeleteCareful screwing into a dropped ceiling in an old building. It probably has asbestos! :( These would be a great idea in a classroom. I'm tempted to hot glue them to my cinder blocks, but still able to still change out the work on the clips more easily!
DeleteI love this! I was actually thinking of doing something like this for my son's playroom so that he can display his art. Your tutorial is genius - so helpful. Thanks!
ReplyDeleteI just did an update to his playroom by creating a little reading zone (see it here if interested - http://visualmeringue.blogspot.ca/2016/01/playing-around-in-playroom.html ), but beside that area is an art zone and I think these will be perfect! Thanks again!
Yes, I've used that Ikea wire hangy-thingy in the garage to hang my husband's baseball caps. Much better that stuffing them all in a box/container, plus they get to "air" out after a particularly sweaty day of mowing the lawn, working on the car, etc.
ReplyDeleteThat is a brilliant idea! Next time I'm there I'm grabbing another one for that!
DeleteYou moved your laundry room to the basement? Odd, as everyone is trying to figure out how to move their laundry room OUT of the basement!
ReplyDeleteYes and I love it! We were warned against potential water issues upstairs too many times.
DeleteWow you make it seem easy, lol! I returned my set a couple months ago because for the life of me I could NOT figure it out! I've put together many Ikea items but this little thing got the best of me lol!
ReplyDeleteThat room looks great! Great little simple and easy project :) Loving this no spend month idea. This room has come a long way and it is beautiful now, can't wait to see more! I like the artwork but maybe a sunkiss mirror or just one picture on that wall will work better?
ReplyDeleteLauren Baxter | Lovely Décor
www.lovelydecor.co
xx
I can NOT figure mine out. It works perfectly until I tighten the two piece of the bar together. As soon as I let go it just (rapidly) unscrews itself and it's loose again.
ReplyDeleteI think it may do that when it's just a bit too tight. I'd try using a little longer wire or moving your bracket just slightly closer. Good luck!
DeleteLove it! You should take a look at my laundry room. I just redid it.
ReplyDeletehttp://centsiblecreativities.blogspot.com
Enjoy the journey and seize the day!
๑Ƹ̵̡Ӝ̵̨̄Ʒ๑*¨*• Barbara •.¸¸..๑Ƹ̵̡Ӝ̵̨̄Ʒ
Great results ... chic and clean. And I love that you didn't have to cash in a savings bond to accomplish it! Would this system also work to make a canopy for a bed? (using lightweight sheer panels)
ReplyDeleteYes, I think it would be perfect for that!
DeleteThat is such a cute idea! Love the way it turned out and I love those lights too!
ReplyDeleteShelley
We used this ikea "curtain hanger" in my daughter's room to hang all her horse ribbons, worked GREAT. So would be terrific for any sport where there are many ribbons to be won or hung, thinking of swimming for example.
ReplyDeleteI've had that same thing from Ikea but couldn't figure it out! What a great idea. I wish I had held onto it! http://www.enchantinglyemily.com
ReplyDeleteI love this! I've been wanting to get something like this to display my kids' artwork as well! I'm glad you put up a step-by-step tutorial -- those Ikea instructions always get the best of me!
ReplyDeletejen @ www.bellenbrooks.com
I just bought Dignitet set in IKEA and tried out the same project as yours. I had a hard time tightening the wires at first but eventually got to fix it myself. I used it for my window treatment in my kitchen. Thanks for this brilliant idea!
ReplyDeleteI have two sets of those and for the life of me can't figure it out! The piece won't unscrew at all on either set. Was it easy for you to do?
ReplyDeleteThe one was super easy and the second I had to unscrew completely and put it back on (the middle piece). I think that happens when it's a little too tight -- maybe try moving it a little closer to the other bracket and try it again?
DeleteI love the bench without the cushion! When you made the cushion and put it there I thought to myself "how could she cover the beautiful wood?"! I did love the colors and pattern of it though!
ReplyDelete