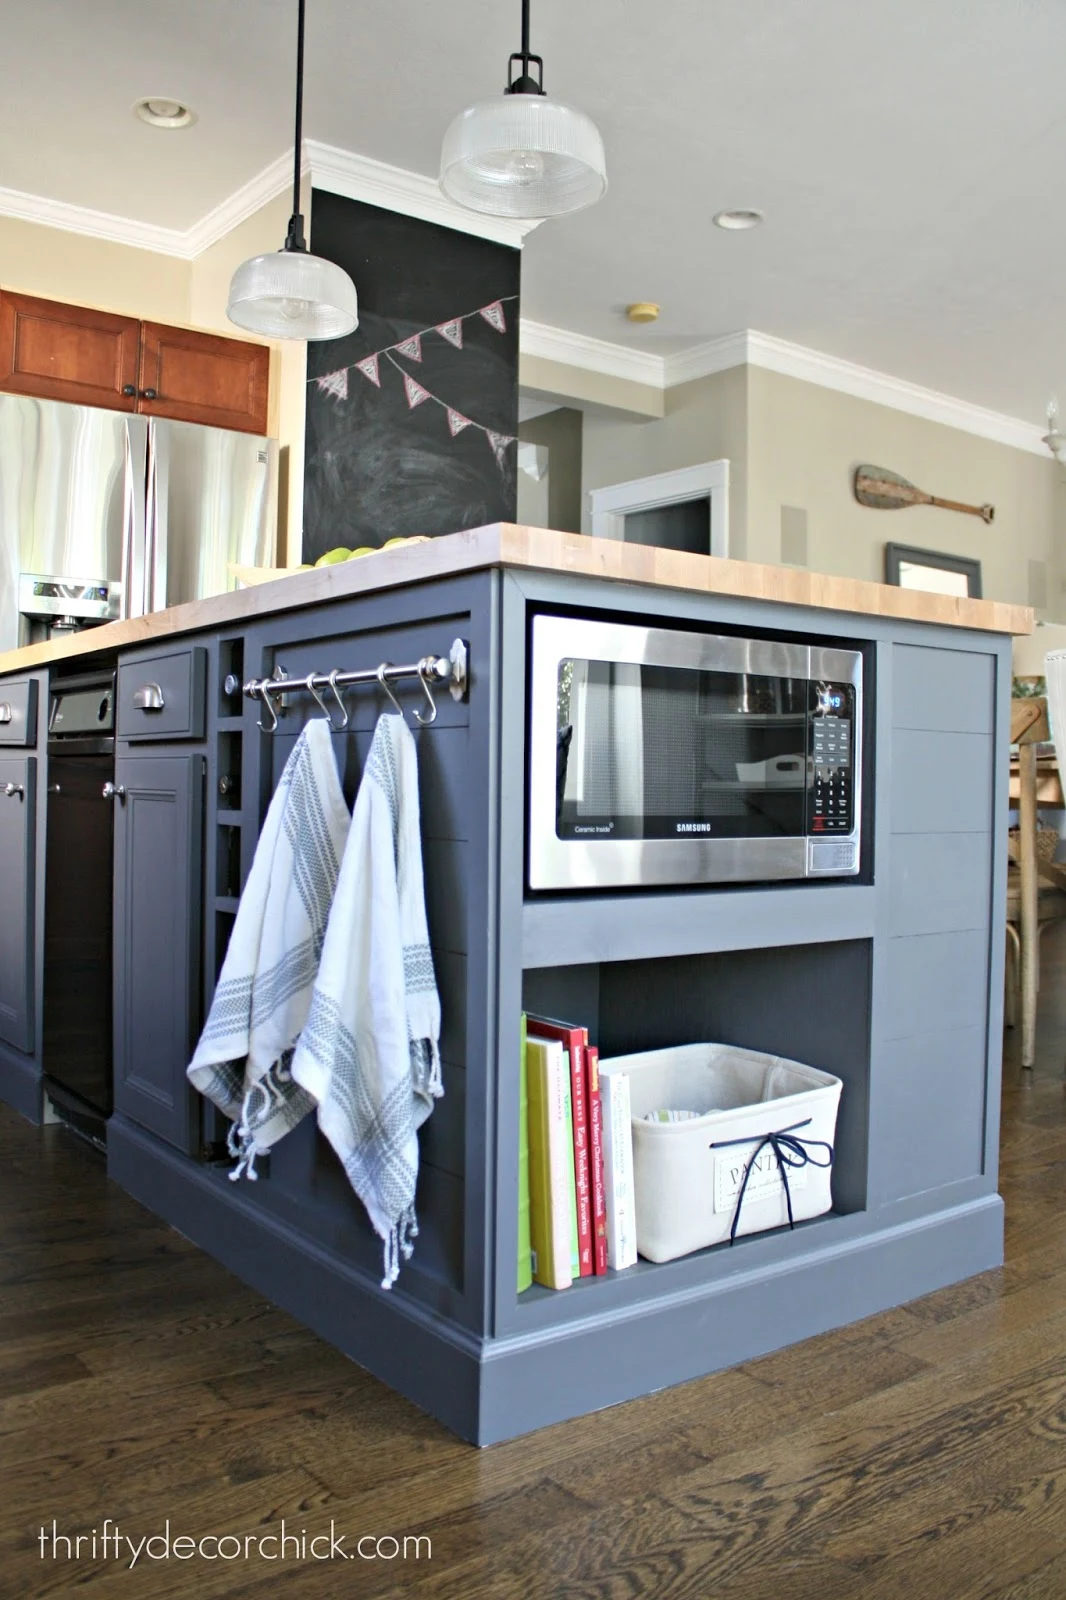
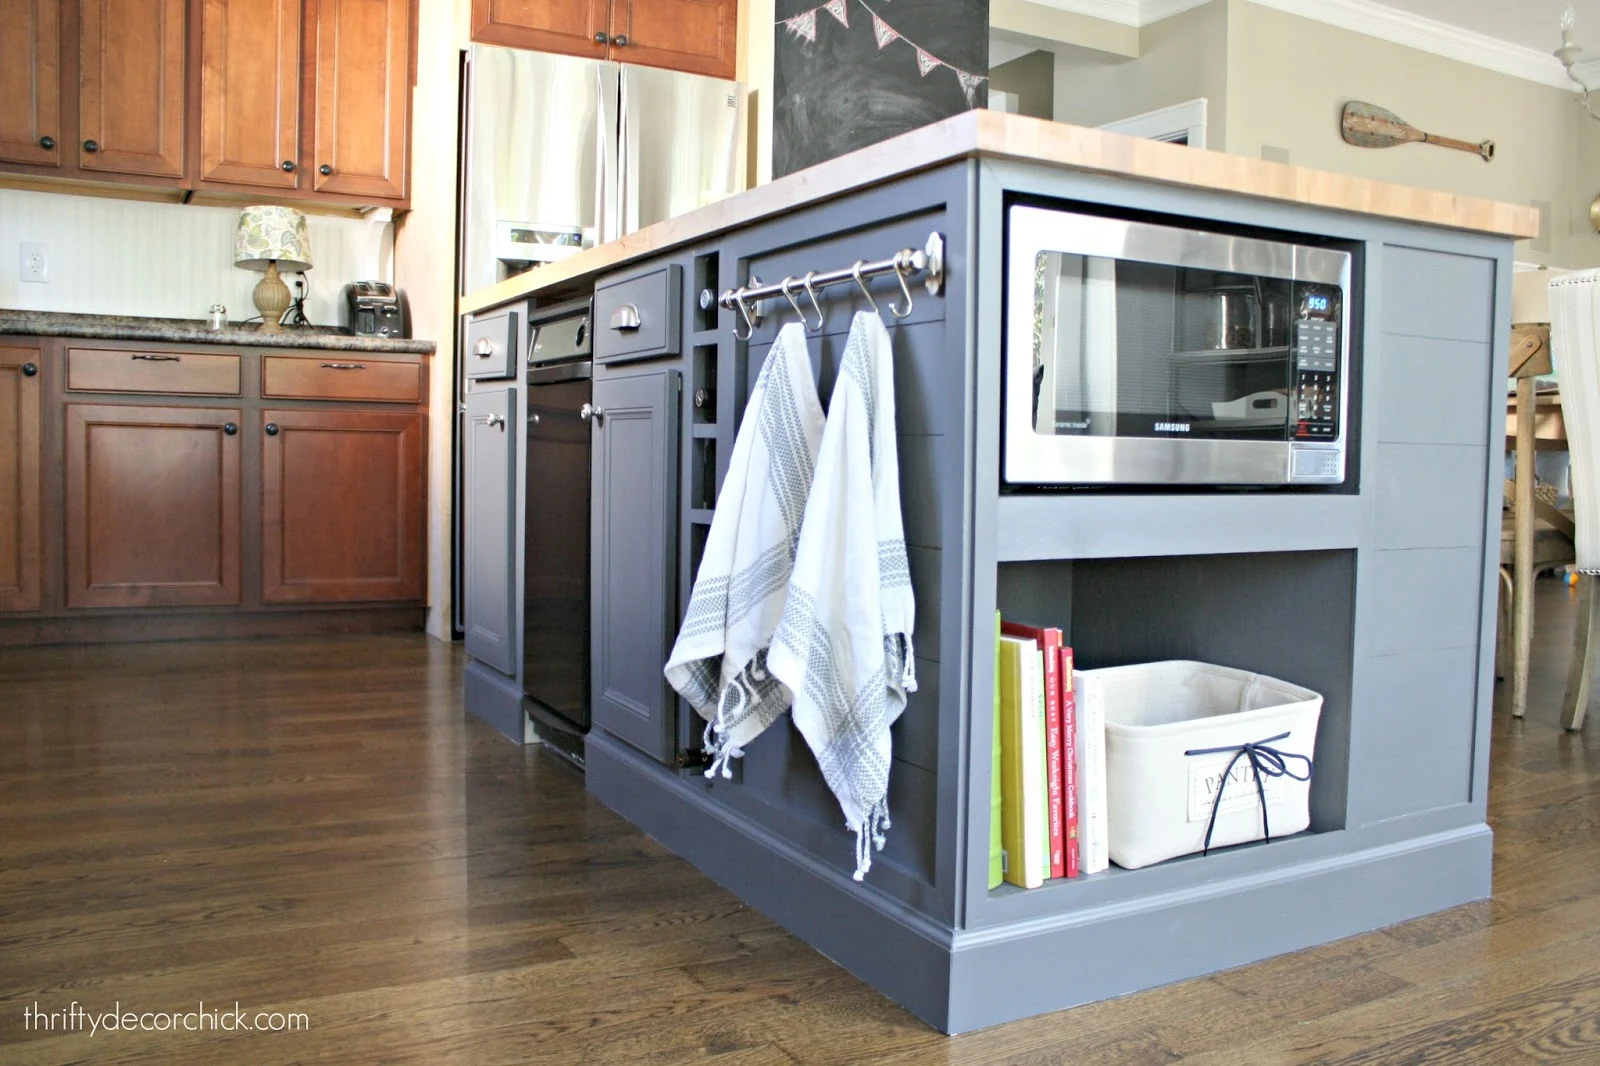
How to move a microwave to an island
August 21, 2015
Share this
I'm completely done with the island makeover! I was pretty much there back in February when I shared the nearly completed project, but we've had an open spot at the end waiting for the microwave since then.
Well now that we've taken the old one and some of the cabinets down, it was time to finally finish up the island! I'm so thrilled about this, I can't even tell you. Love it.
I showed you how I extended the island and I was left with this open space at the end: 

To add the shelf I started with supports. They were just scrap 1x2 that I secured to the inside with screws. I made sure they were level and also made sure to mark where I wanted them to hang towards the front. I was going to finish it up with some trim along the front of the shelf so needed to make sure it would be flush with the front.
You'll notice my supports didn't go all the way to the back. I made the shelf a few inches short in the back to allow for some air flow. Otherwise I'd normally add a support to the back too.
Next I placed the shelf on top:
You want to make sure to predrill your holes for the screws in everything. If you just screw them in without doing that the wood will most likely split. And that's annoying. :)
You've got yourself a shelf!:
Isn't this EXCITING?? It was for me, not gonna lie. Make sure to sink your screws in if you'll see them at all. I usually use nails for this part but had the screws right there so I just went with those. Either is fine but nails are easier to hide. :)
I added the trim to the front to finish it off. This is why I had to be careful where I placed the supports -- too far front and the trim would stick out. Too far back and it wouldn't be flush:
I painted it out in my favorite gray, Peppercorn, and placed the microwave inside when it was dry:We went with a Samsung microwave -- it was on sale and the power is the same as our older version. I wasn't concerned about the smaller size, I just wanted it to heat stuff up as quick! We don't use it much anyway, just smaller dishes and reheating.
There is plenty of space behind the microwave for ventilation and some on the sides as well. I did a lot of research on placing a regular microwave in an island -- I went ahead because I've seen it done a million times and have a few friends who did it as well. They've had no problems at all. I would definitely recommend doing what I did with the shorter shelf or adding ventilation of some kind though:
We barely spent much on this between selling the old one and it being on sale, and I had all the materials for the shelf. This was a pretty inexpensive project all in all!
So far I LOVE it here. It is so nice to not have it as the focal point in our kitchen. It's been easy to use, it just takes some getting used to. We don't really have to bend down too much to get stuff in and out and we're tall. We bend down much more often to get things out of kitchen cabinets every day. I already love that I can put hot items right on the island instead of trying to get them safely down from over the oven.
If you have small kiddos you may want to make sure there is a lock feature if you do this. :)
I will definitely keep you updated on how we like it! I am pretty sure I will love it. I know I love how this gets it out of the way:
Here's a view of the island as it started out earlier this year (it didn't always look like this, we had to tear it apart to move it during our renovation):
Those squiggles are lines of glue from the numerous makeovers the little island had gotten. ;)
Here's the end during the process. I used cheaper plywood for this part because I knew we wouldn't see much of the inside when I was done:
And here she is completed! Finally!:
LOVE!It feels so good to knock things off the kitchen reno list! Have you considered moving your microwave? Do you have one in your island as well?
Have a great weekend! :)
P.S. Check out how the island looks in our finished kitchen!:


Looks great! We don't have an island we have a 1960s breakfast bar complete with view blocking upper cabinets. I would like to do something like this but the layout is a mess. We wouldn't be able to open the fridge. No complaints though b/c our last kitchen was the same size as our current breakfast bar. No joke. Three upper cabinets (one was really small like an above fridge cabinet) and three lowers. That was it.
ReplyDeleteLooks so pretty there! Love that it is out of the way. Hate how much space mine takes on my counter. Good Job!! Marianne
ReplyDeleteLooks awesome! I bet you're so happy it's done! Have a great weekend!
ReplyDeleteIt looks wonderful. I wished I could put mine somewhere, but I too did a research and I wanted it on a shelf above my range, but I read that it was not a good idea. So it sits taking up alot of my counterspace.
ReplyDeleteWe have had our microwave above our range forever... no problems . I t doesn't sit on a shelf but hangs underneath a shorter one.
DeleteIt looks great! Very polished. Isn't it so fun seeing your visions become a reality?!
ReplyDeleteSuch a good use of space!
ReplyDeletedang that's awesome!
ReplyDeleteThat looks really nice Sarah! I like how you created the bookshelf under it. My parents had their microwave under their counter in the cabinets for years and it was no biggie. It was just a regular microwave. My dad is 6' and it was not a problem for him. Enjoy!
ReplyDeleteIt looks great. Glad you are back to finishing the kitchen.
ReplyDeleteLooks great! Love the blue. My microwave is in my island and love the location too!
ReplyDeleteI love it Sarah!!
ReplyDeleteBeautiful. Love the color you painted it.. Know you will love it.
ReplyDeleteIt's gorgeous! I think you'll love it there! I've never had any problems with mine down low and I love not having to get hot things out above my head (I'm short). The only problem is guests can't find it ;)
ReplyDeleteLooks beautiful & more efficient! Wish I had room for an island just so I could put the microwave in it!
ReplyDeleteI love it! Nice to have it out of the way yet still in a convenient space. Now I just can't wait to see what you decide to select for a range hood! :-)
ReplyDeleteAbsolutely awesome! Looks so professional and custom- beautifully done! Just curious: what model Samsung microwave did you get?
ReplyDeleteAwesome answer to my earlier question (where is micro going?)
ReplyDeleteWow I love it! What a great color too for the island!
ReplyDeleteAhh, it looks awesome! Been waiting to see this step - how exciting that things are moving forward at full speed now with your kitchen reno!
ReplyDeletePS - I tried your hydrangea bath trick this weekend and it worked BEAUTIFULLY!
Looks great! And love the towel rack hanging near it!
ReplyDeleteSarah, I've been following your Blog for a few years, back to your transition from dining room to library, at least. Love your incremental kitchen remodel and will follow in your footsteps. Question: Have you done anything more with your inner kitchen base cabinets? I remember a post about a DIY slide-out shelf. In our kitchen, there is a traditional long base cabinet with the slimmer shelf above. At this point in my life, I'm sick and tired of having to get down on my knees to retrieve pots, pans, and having to search for whatever. I'm wondering, in your opinion, Sarah, would it be more cost effective to replace that section of bottom cabinetry with a new base cabinet which already has slide out shelves, or hire someone to install the slide-outs from Home Depot or Lowe's? Our Uppers and some of our Lowers are still in good shape and work well, except for this long base cabinet.
ReplyDeleteWhat kind of microwave did you use under the island?Was it a regular Samsung microwave?
ReplyDeleteYep!
Delete